By submitting your email address, you agree to receive follow up emails about RankSense’s products and services. You can opt out at any time by clicking the link in the footer of our emails. We share your information with our customer relationship management partners. For information about our privacy practices, please see our privacy policy
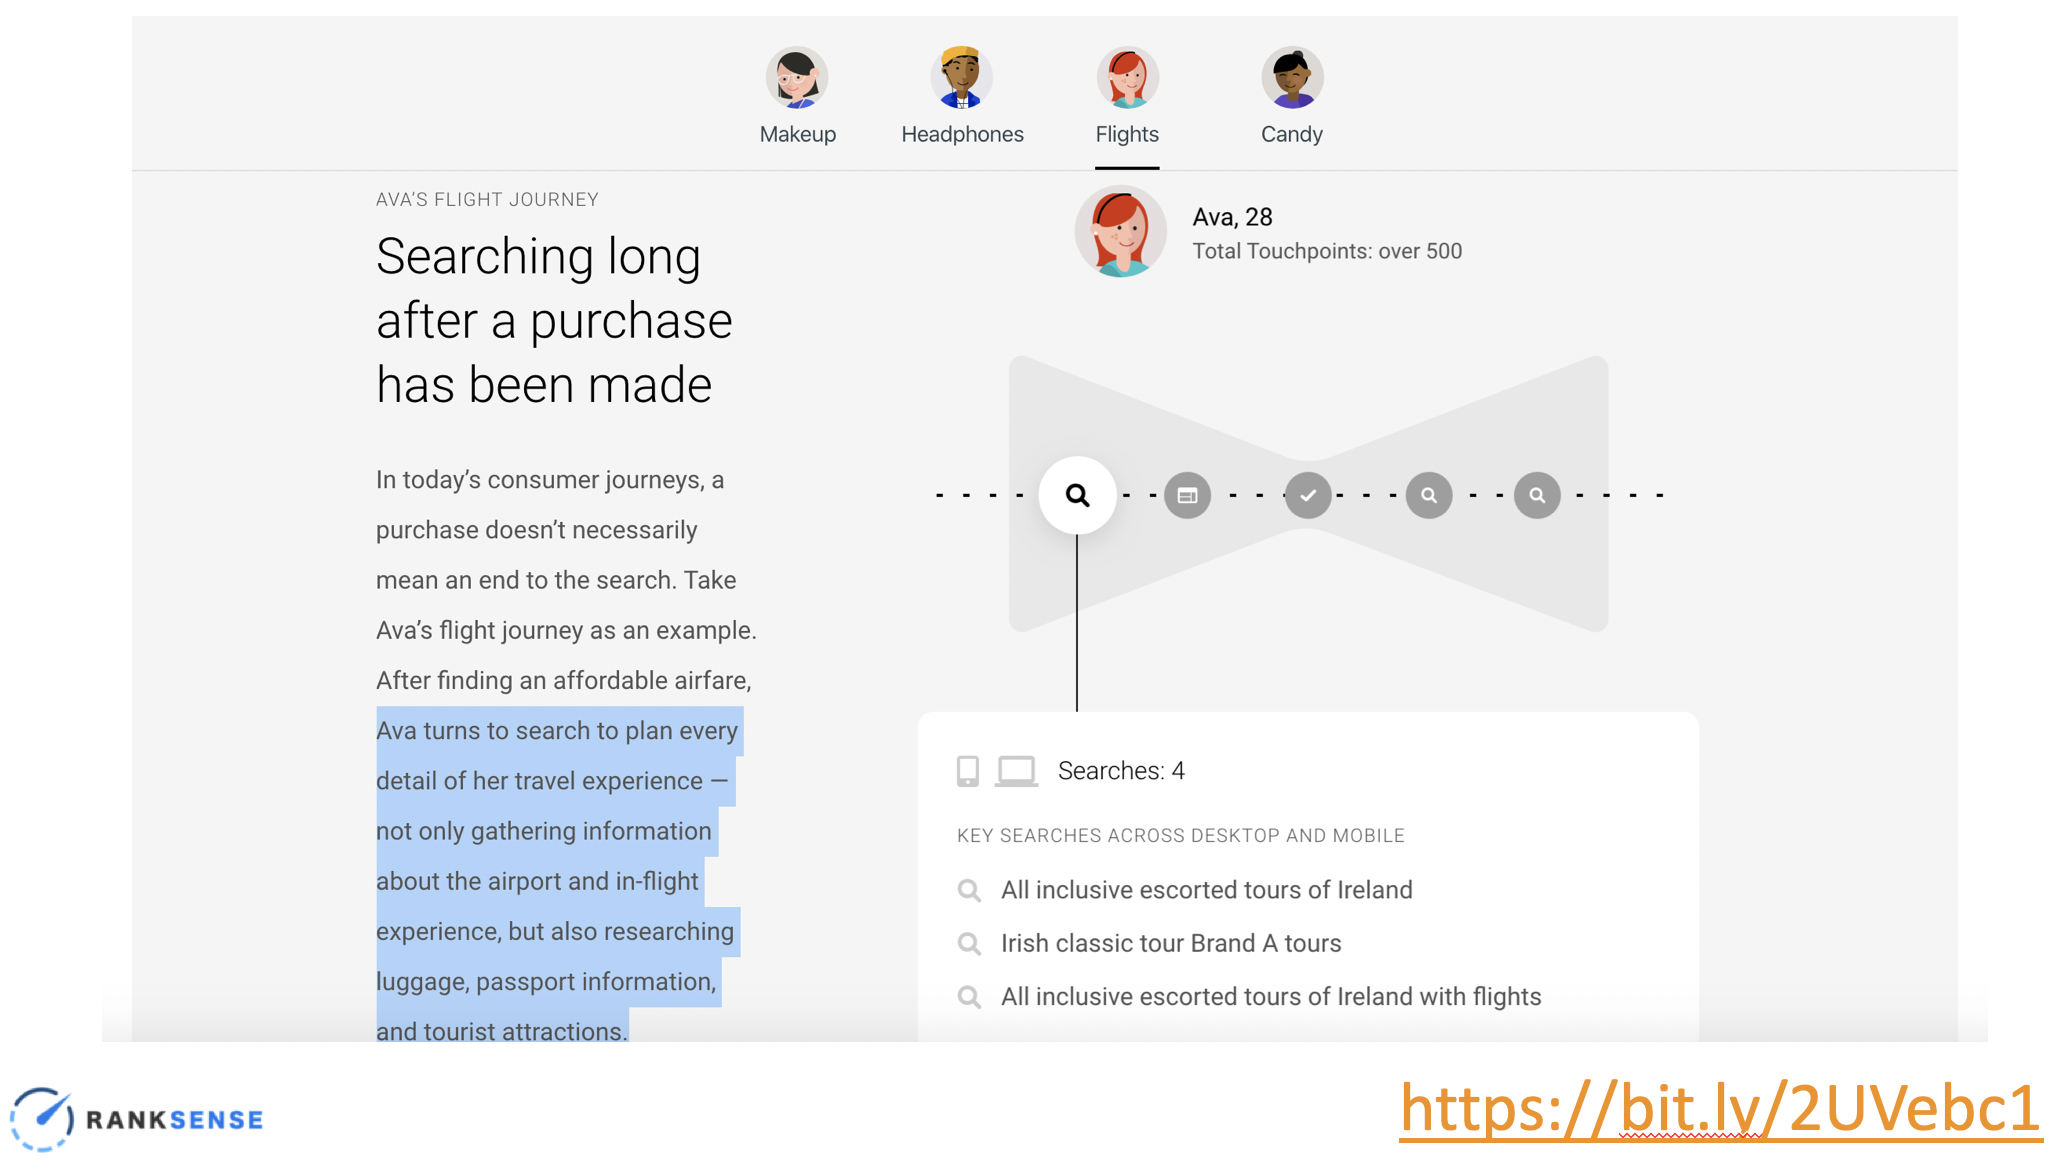
The buyer’s journey—the transition of a potential buyer throughout different stages, was previously known to follow a linear path, each step occurring before the next. This is no longer the case.
Research conducted by Google showed that with all the different devices and the various ways people interact with brands and websites, each consumer develops their own unique journey with varying touchpoints along the way.
Not only does this affect the steps prior to the purchase, but it also creates additional steps once the purchase is completed, as consumers are invited to write reviews and share photos of their new product via social media.
How can you possibly track and keep up with each and every personalized intent journey?
Google’s solution: automate everything. “Machine learning can help you understand and predict intent in ways that simply aren’t possible manually. It can also help you find missed or unexpected connections between business goals and the habits of your key customer segments.”
Let’s do that!
Watch Hamlet’s full presentation on SEO4Life:
Building an Intent Classification Model
Not only will this model measure intent related to informational and transactional value, but it will also look at the context of each query.
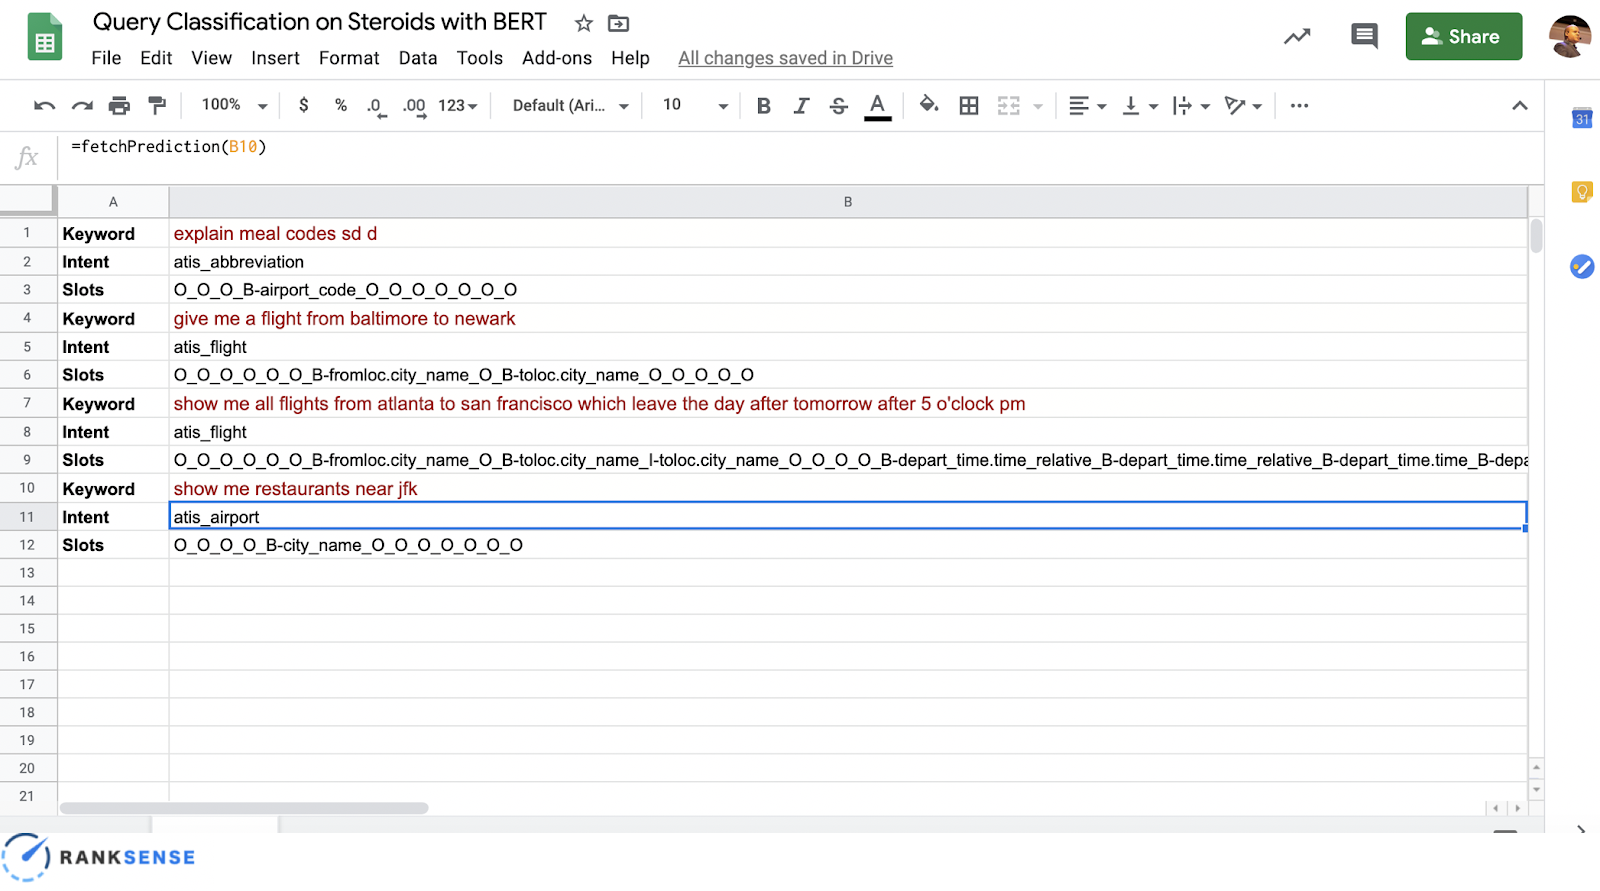
Here is a peek into our final output of this exercise.
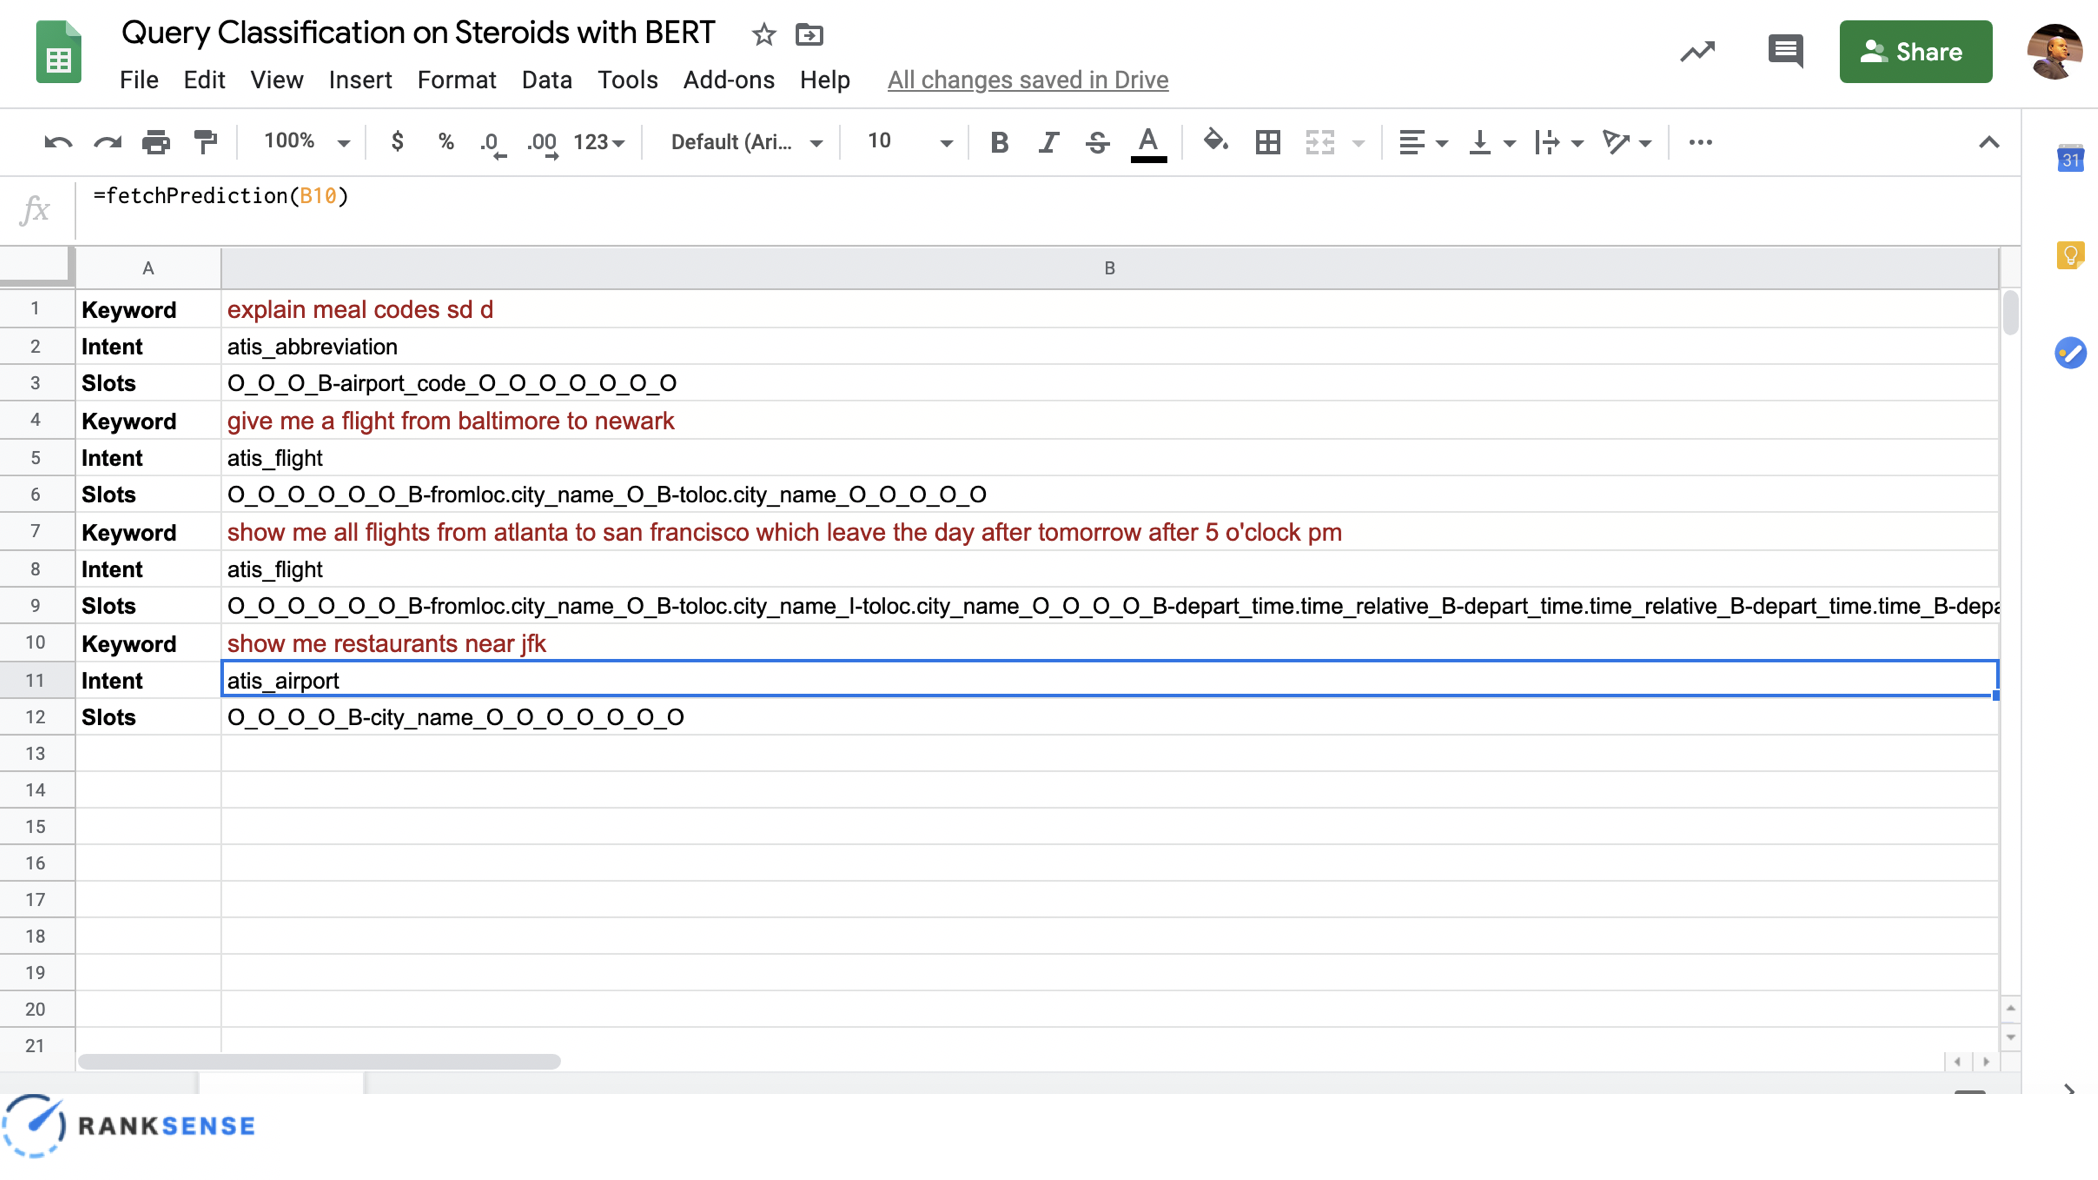
“Show me all the flights which leave the day after tomorrow after 5 p.m.”
With a simple Google Sheets function, fetch and prediction, we can determine the query is about a flight, but more importantly, we can break down the query into the components of the search, such as city location or departure time. With all this relevant information, you can find gaps in your content strategy at a granular level.
You may be wondering, “How are we able to do this in Google Sheets? What formula would be able to do this?”
Here are the steps:
Build a sophisticated deep learning model that can parse not just intent, but also specific actions like the ones you give to Google Assistant, Siri, and Alexa
Access the predictive model using a simple custom function in Google Sheets
Ngrok—will allow us to make our model in Google Colaboratory public
Apps Script—will allow us to code the model and make it available in Google Sheets
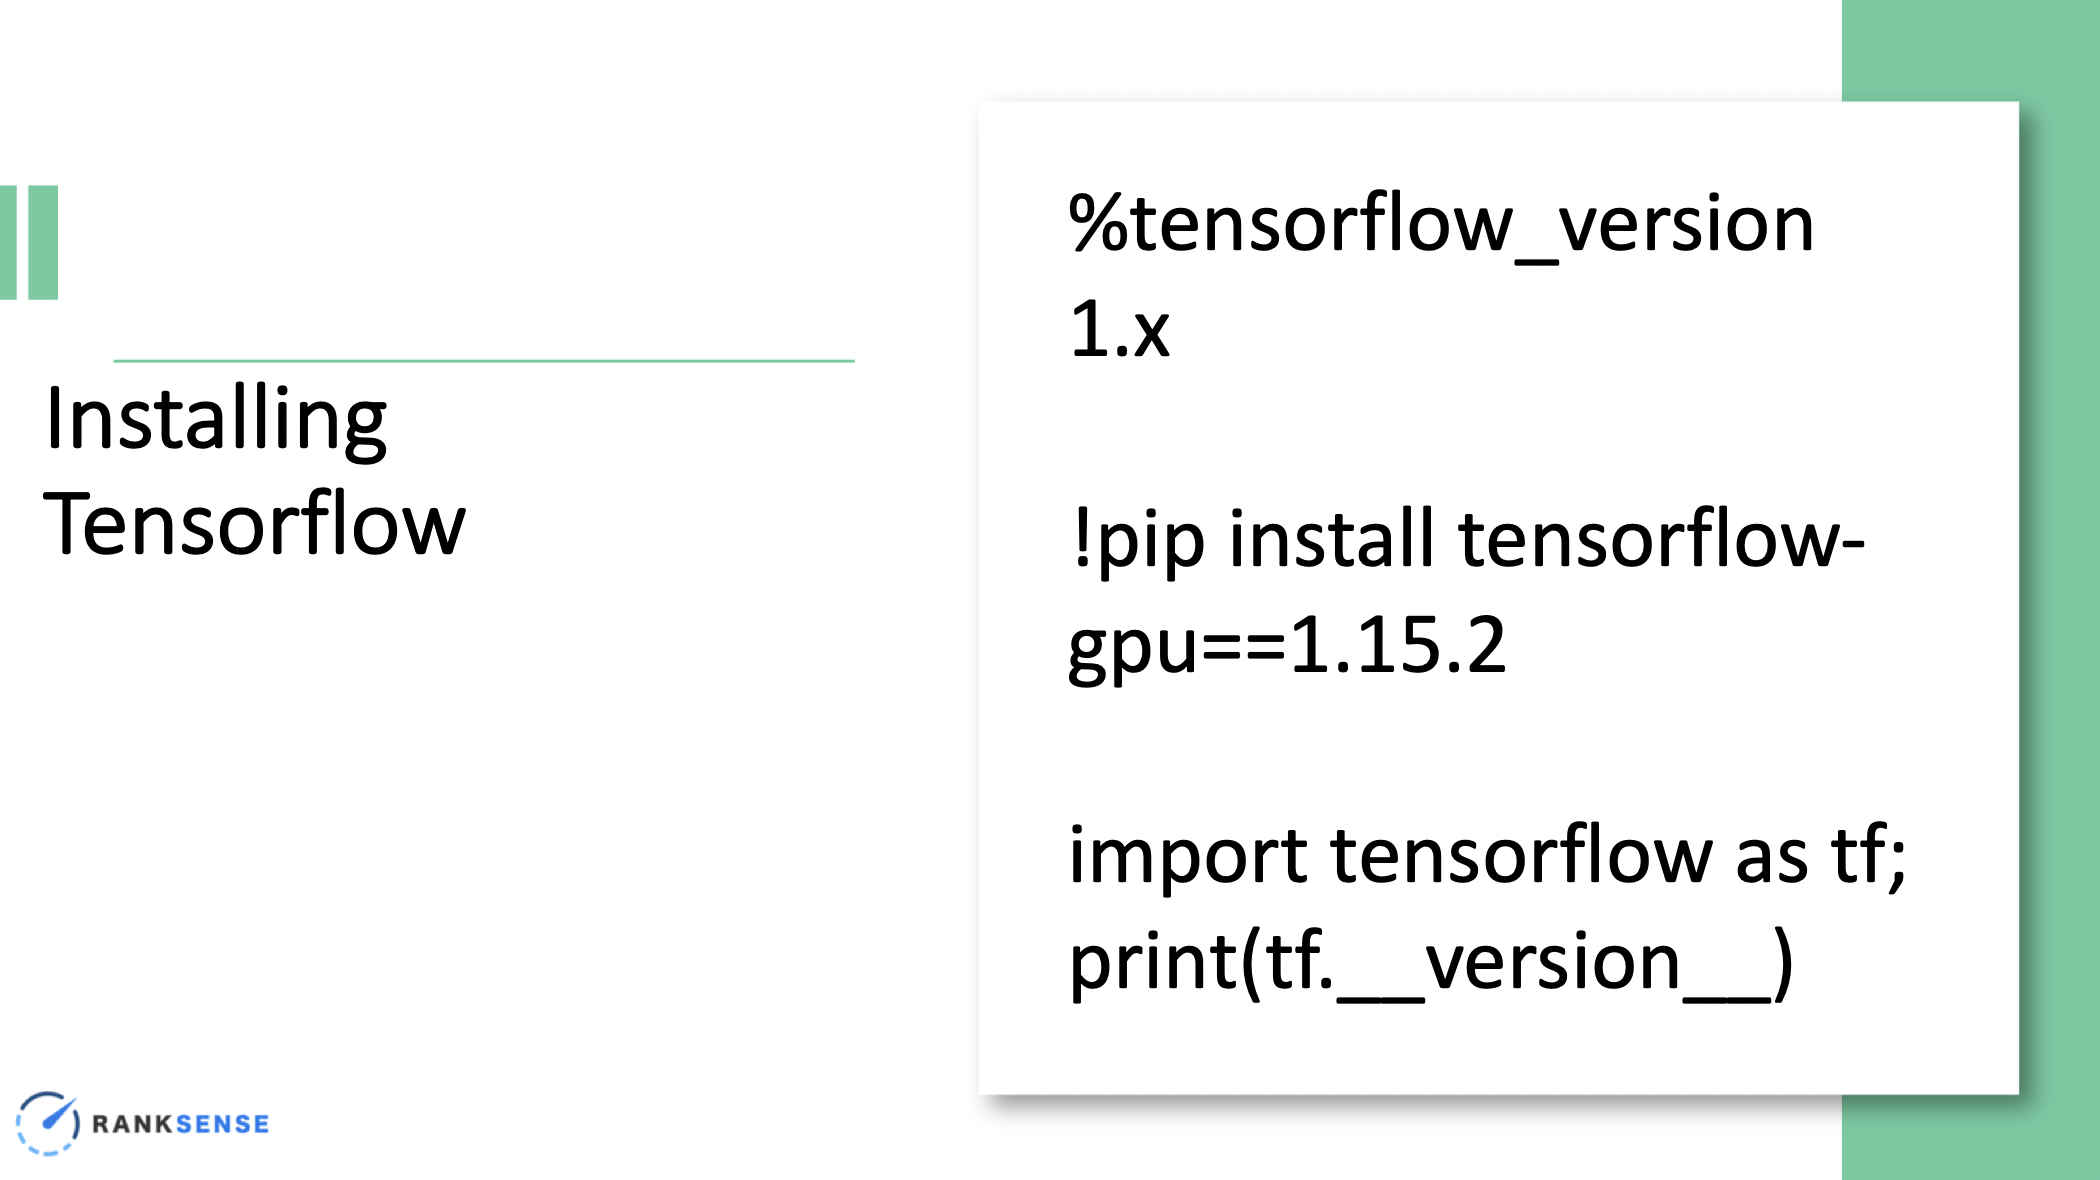
Setting Up the Notebook: Downloading all required packages
To get started, use this link to open the Notebook. From there, hit “Open in Colab” which will give you an open notebook where you can go in and simply type the notes and comments presented throughout Hamlet’s presentation and this blog post.
Make sure that you change the Runtime to GPU (Runtime > Change runtime type > Hardware accelerator > drop-down arrow > select GPU), save it, and then hit connect to allow you to type the comments.
First, copy and paste each comment below into your notebook and ensure you have the right version in order to install the required packages.
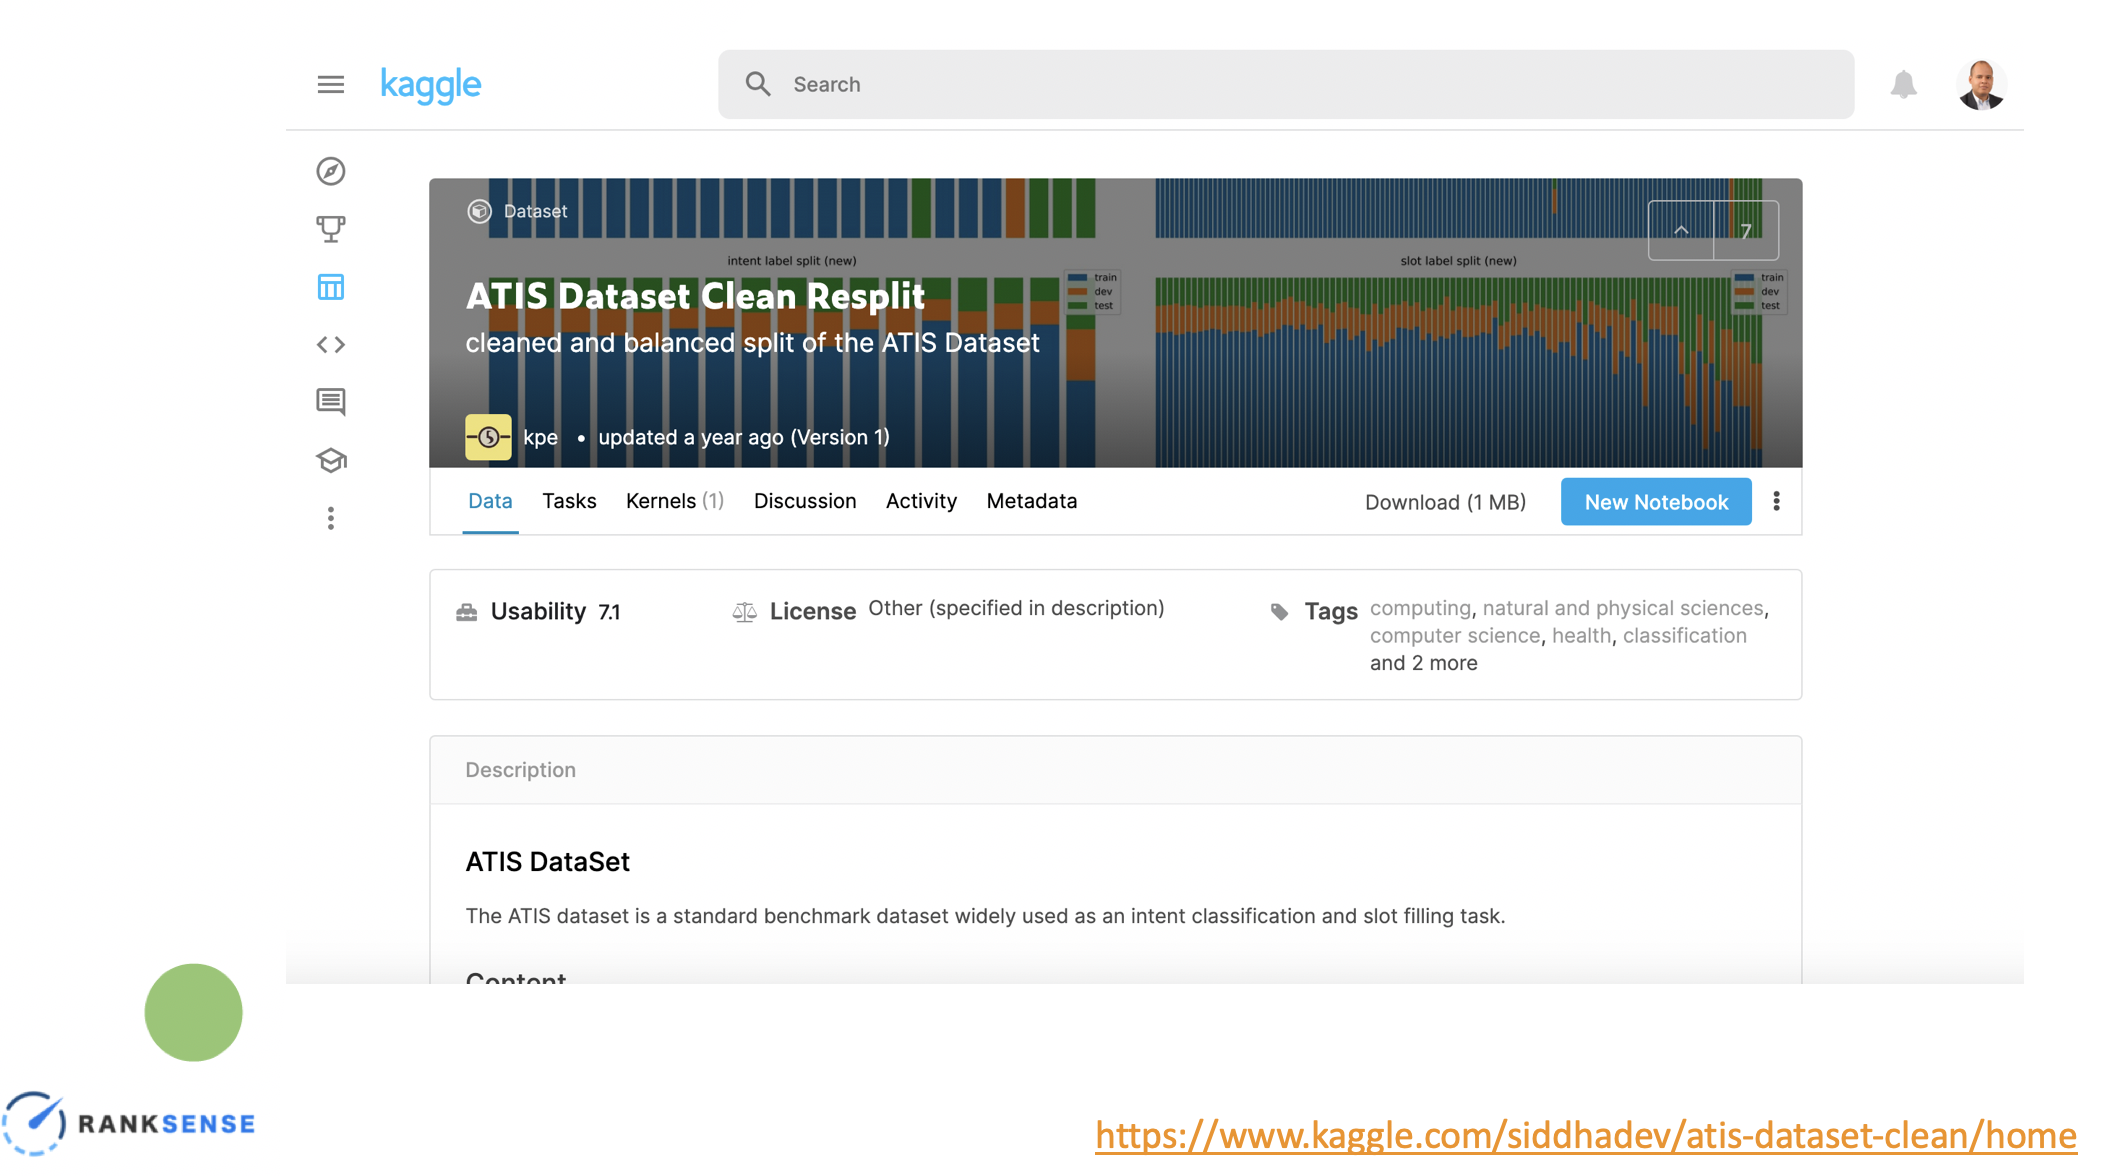
You can now download the ATIS Dataset to your computer by logging into Kaggle using this link.
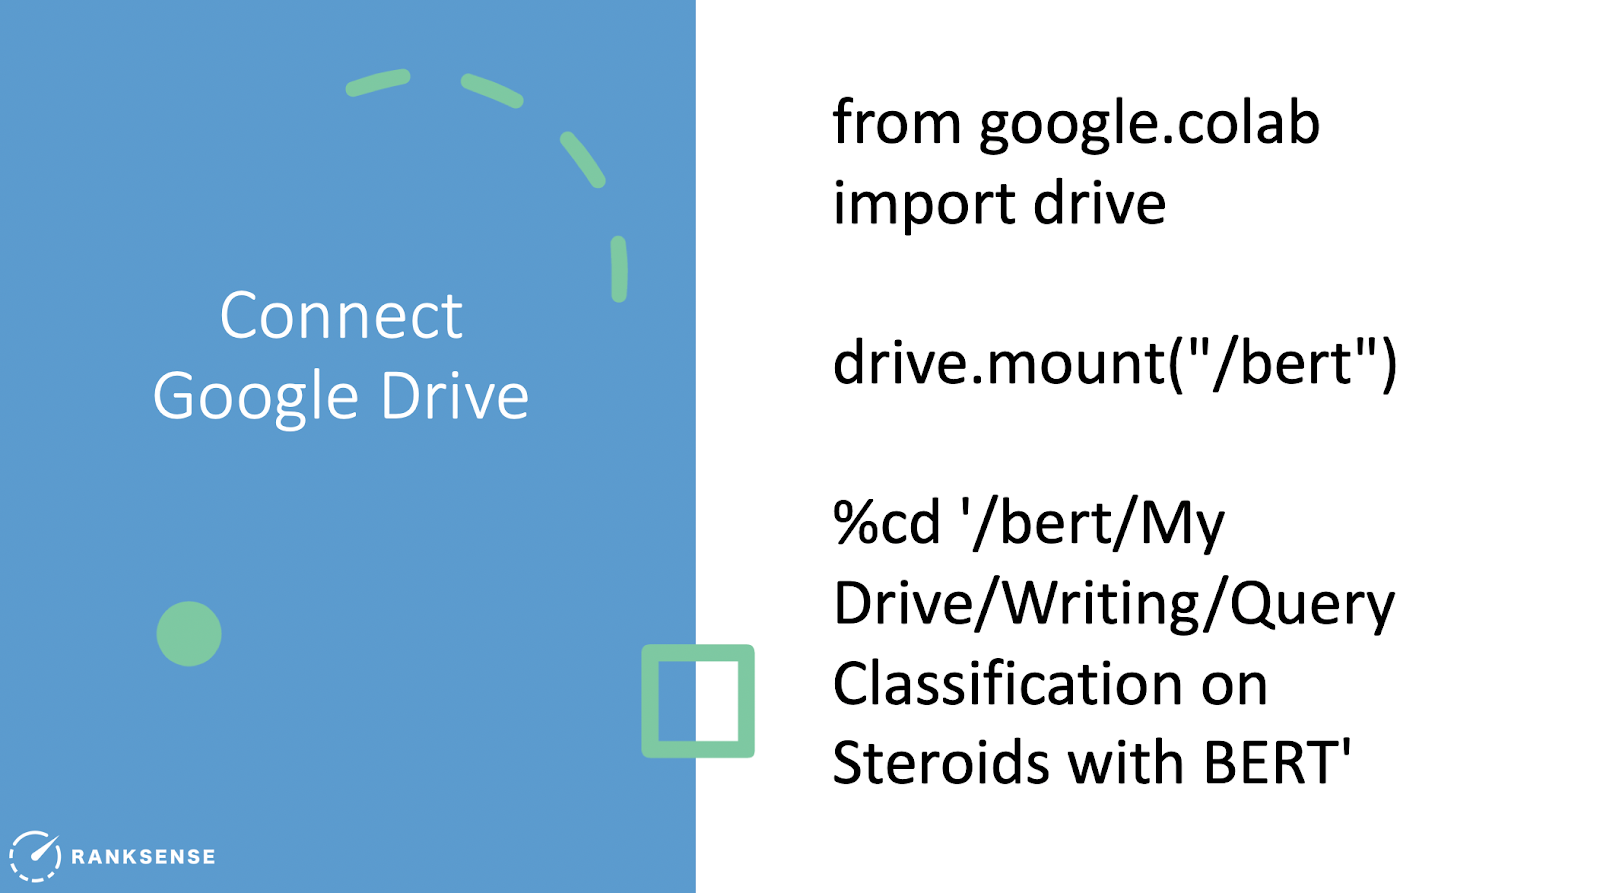
Next, upload it to a directory in Google Drive and connect it to the Colab Notebook.
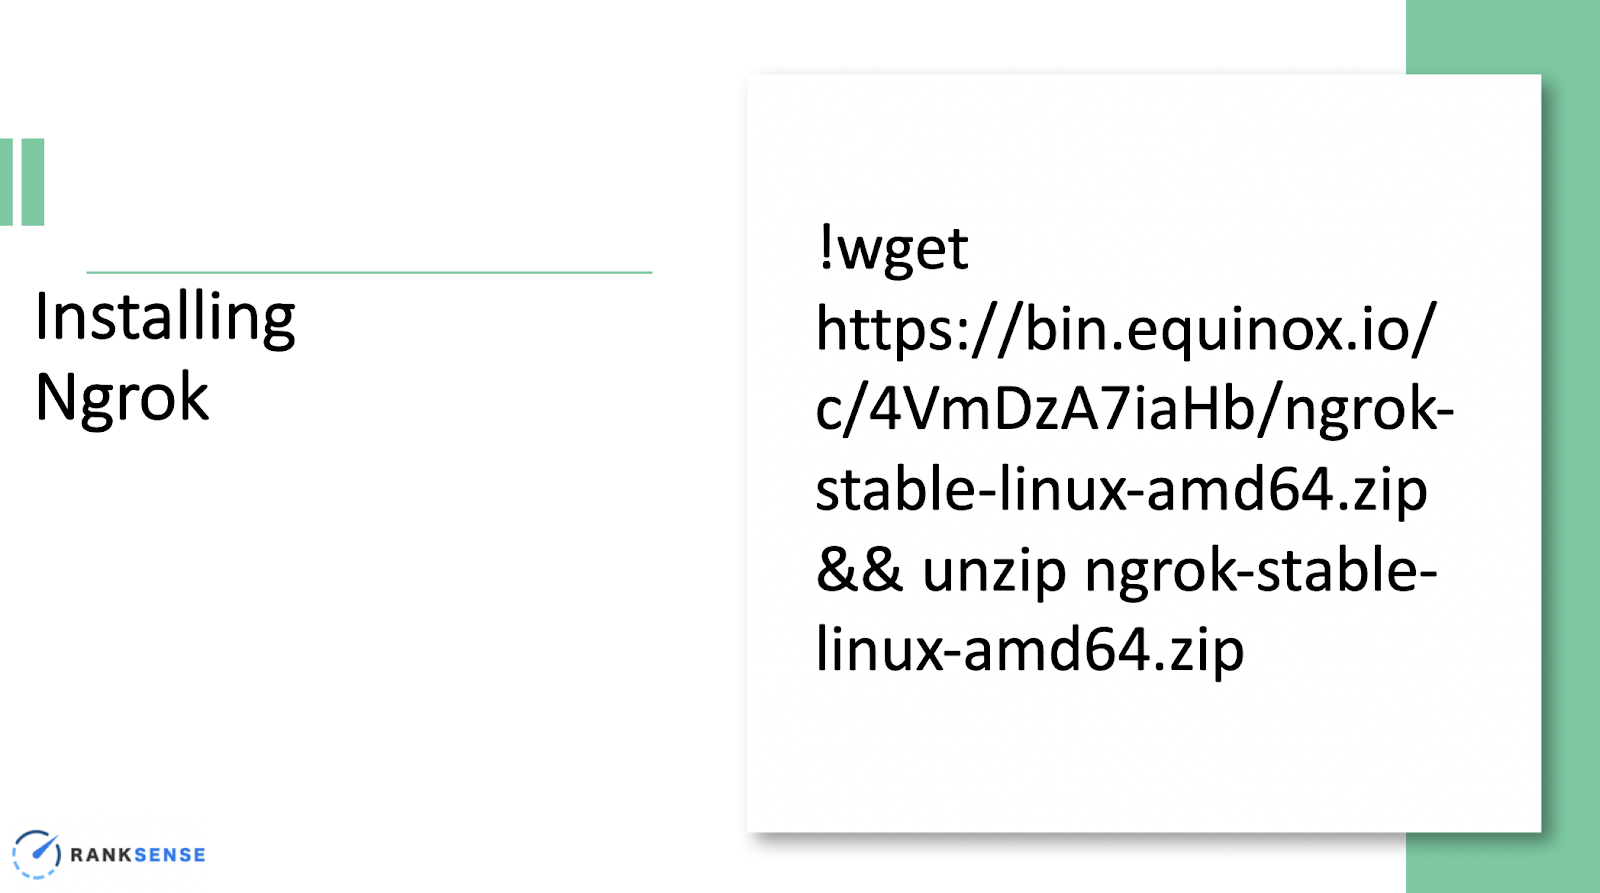
Finally, download and install Ngrok using the code below.
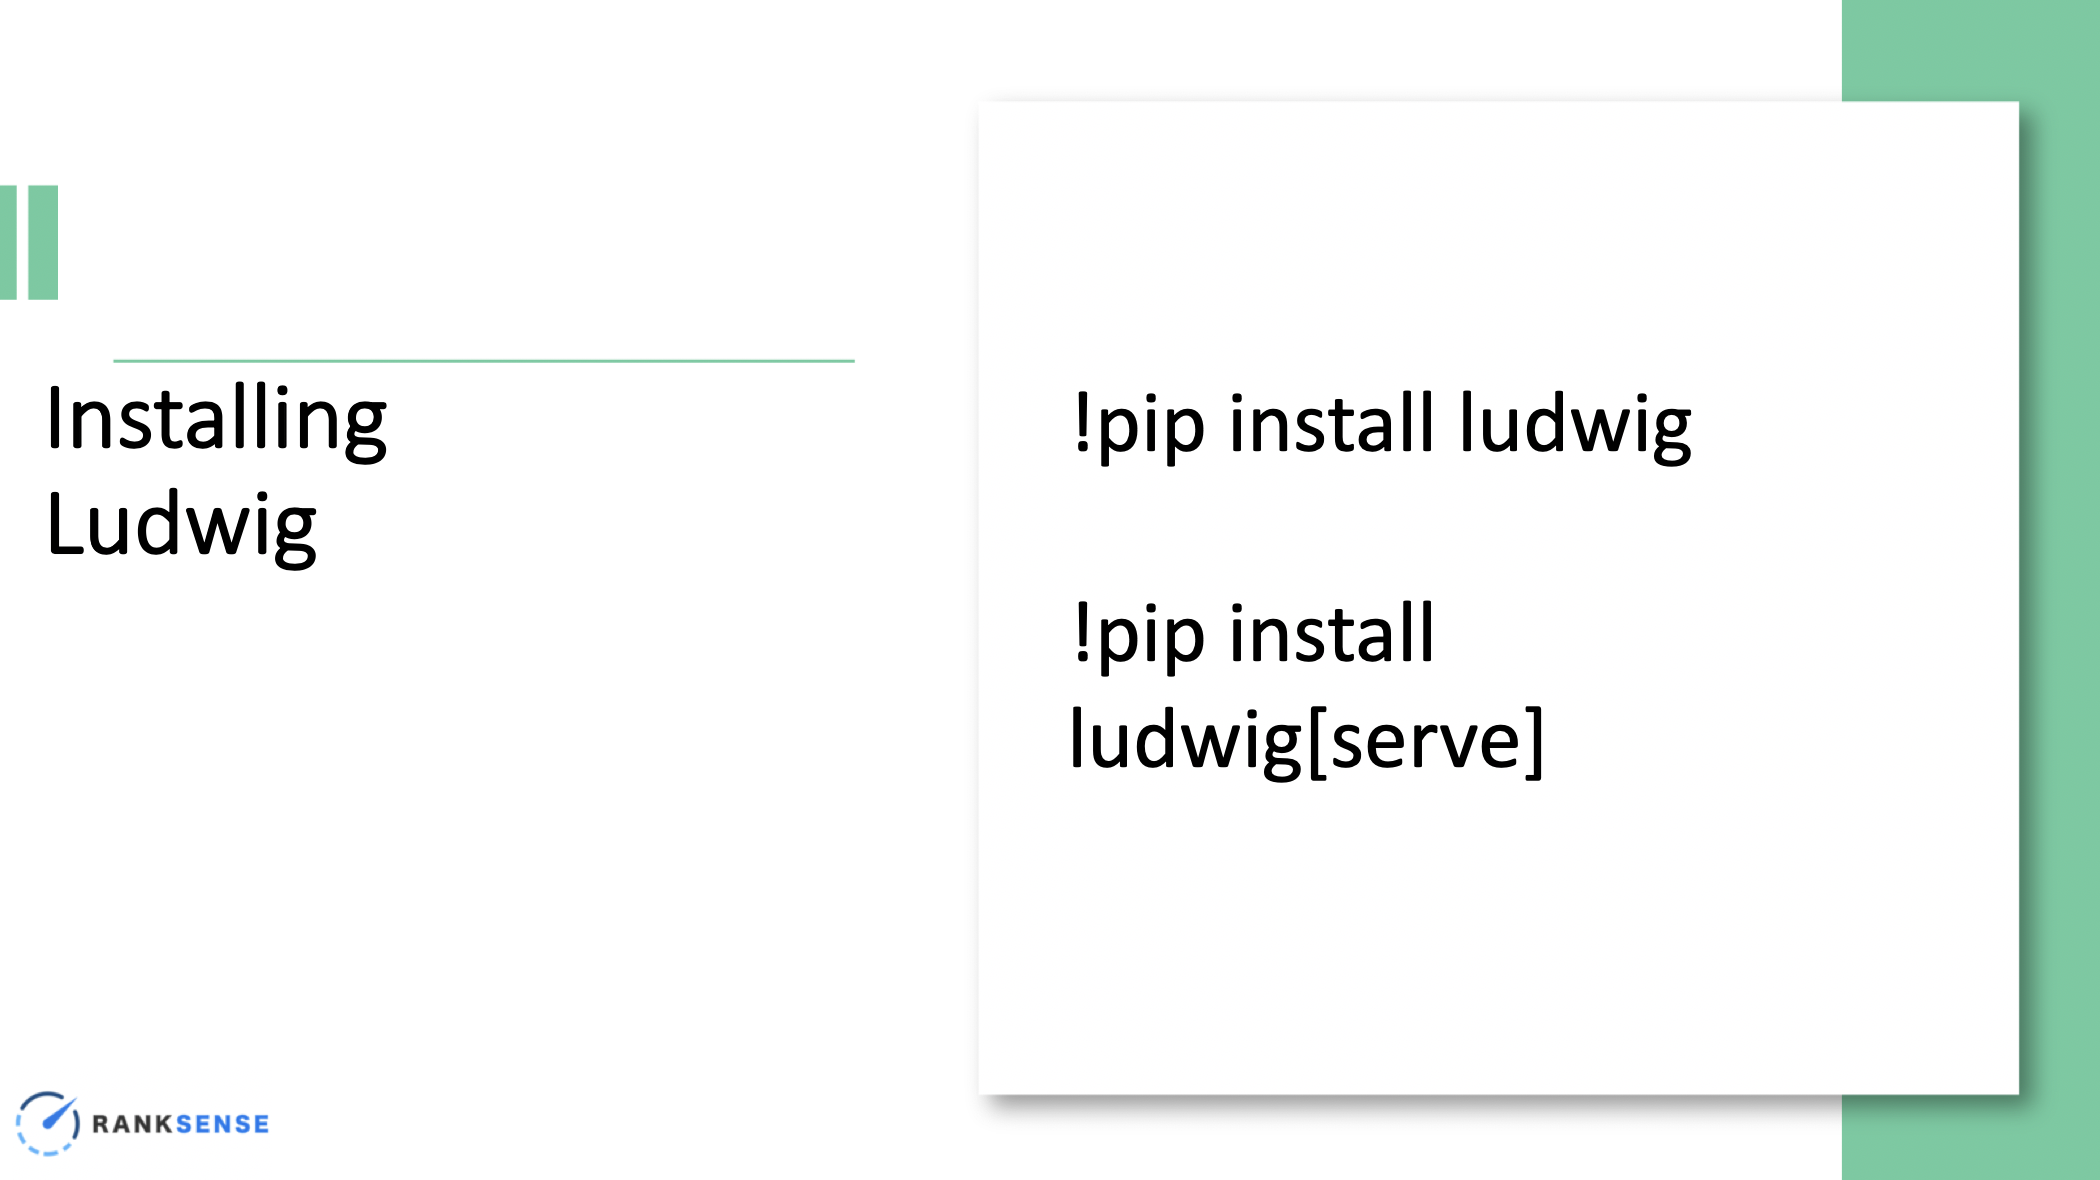
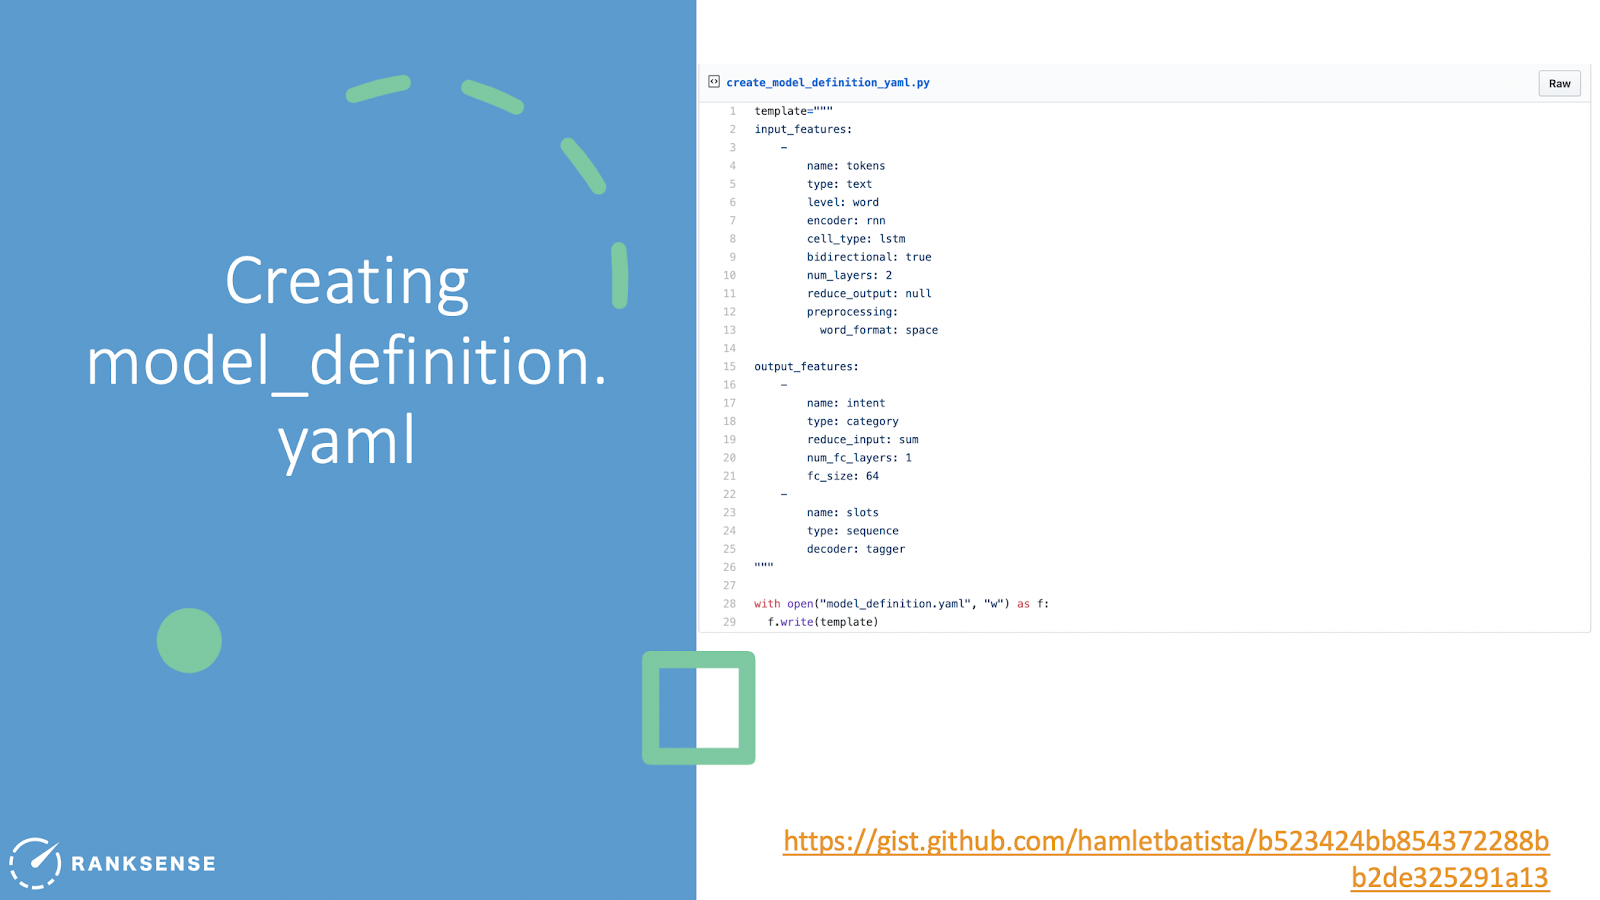
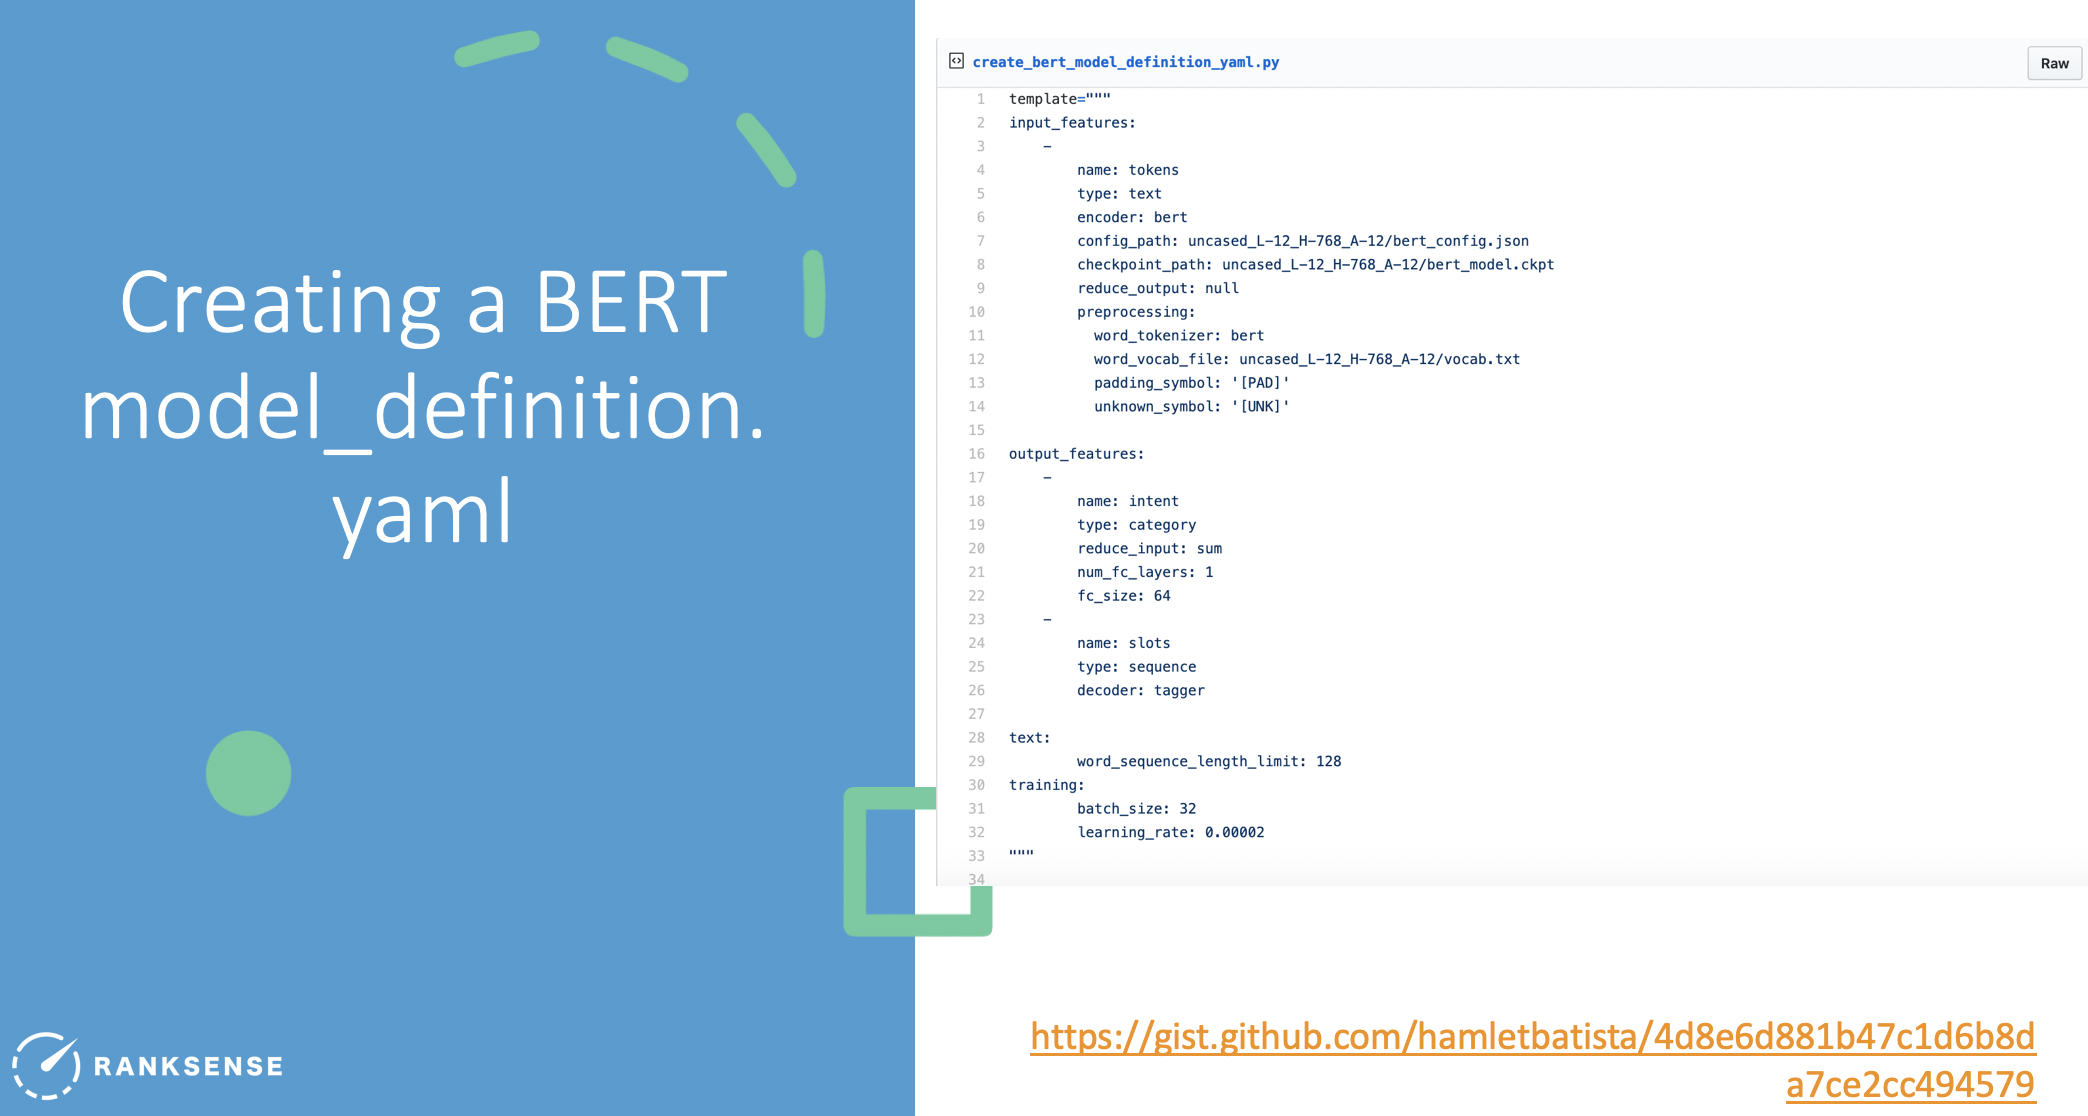
Preparing the Training Data: Setting up the Ludwig configuration file
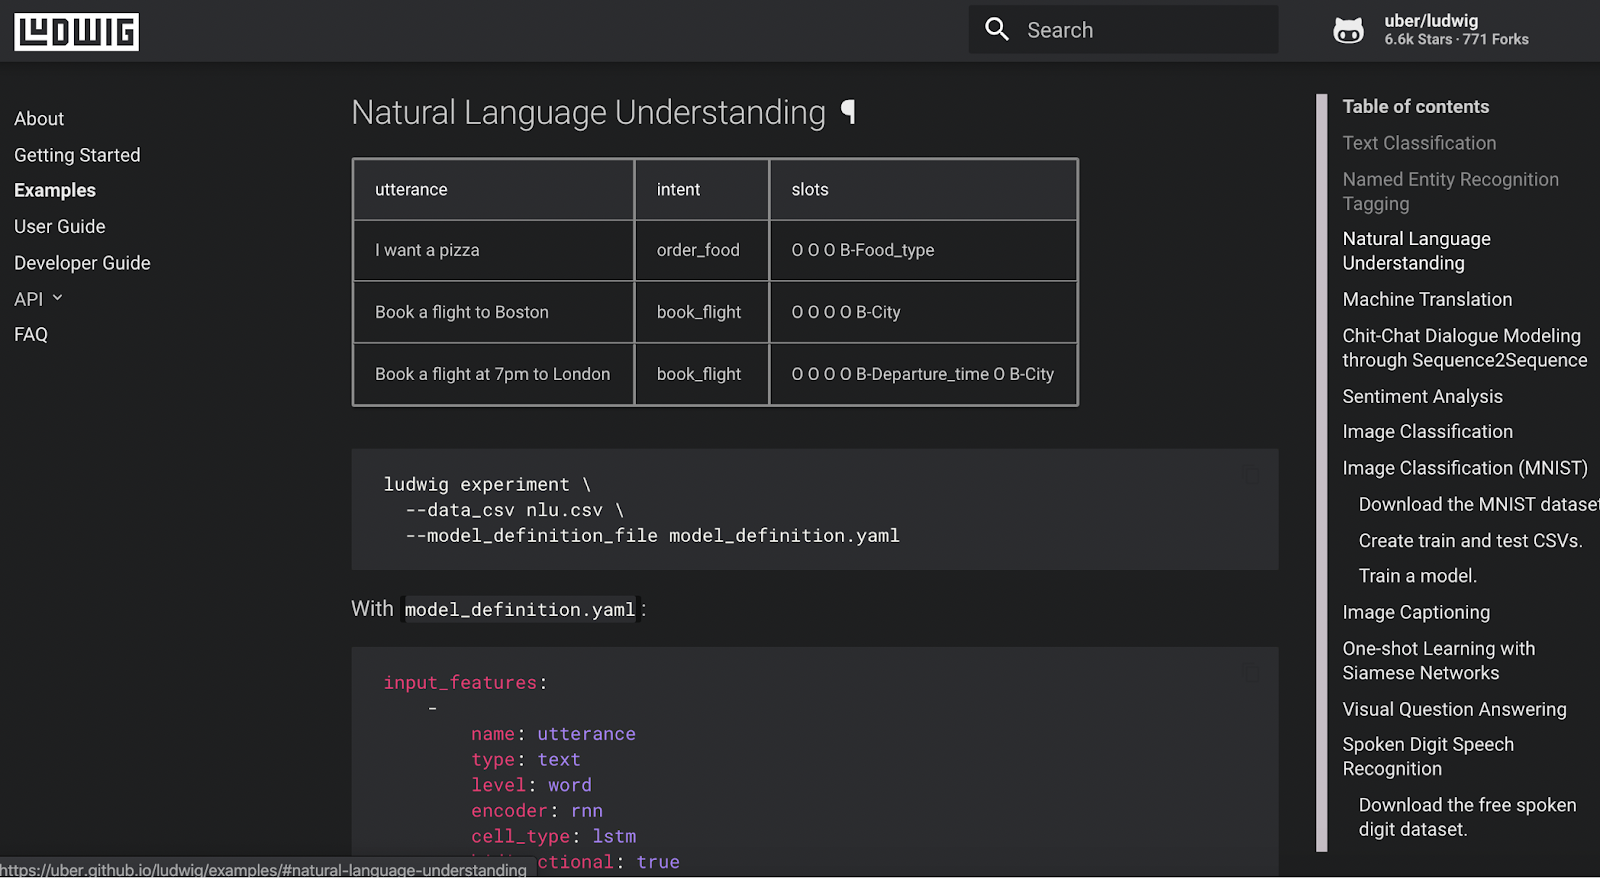
Now, In Ludwig, we’re going to use the Natural Language Understanding example. You can run a comment with the source data we have downloaded and create a model definition file. Once we have this in our data system, it is going to try to learn from this dataset using the first column to predict the intent and slots column.
We’ll use this example in Ludwig and make a few small modifications. Use this gistto access Hamlet’s modifications where he changed the name of the first column to tokens.
Note: When you copy this code in the notebook, it will create the file within the notebook.
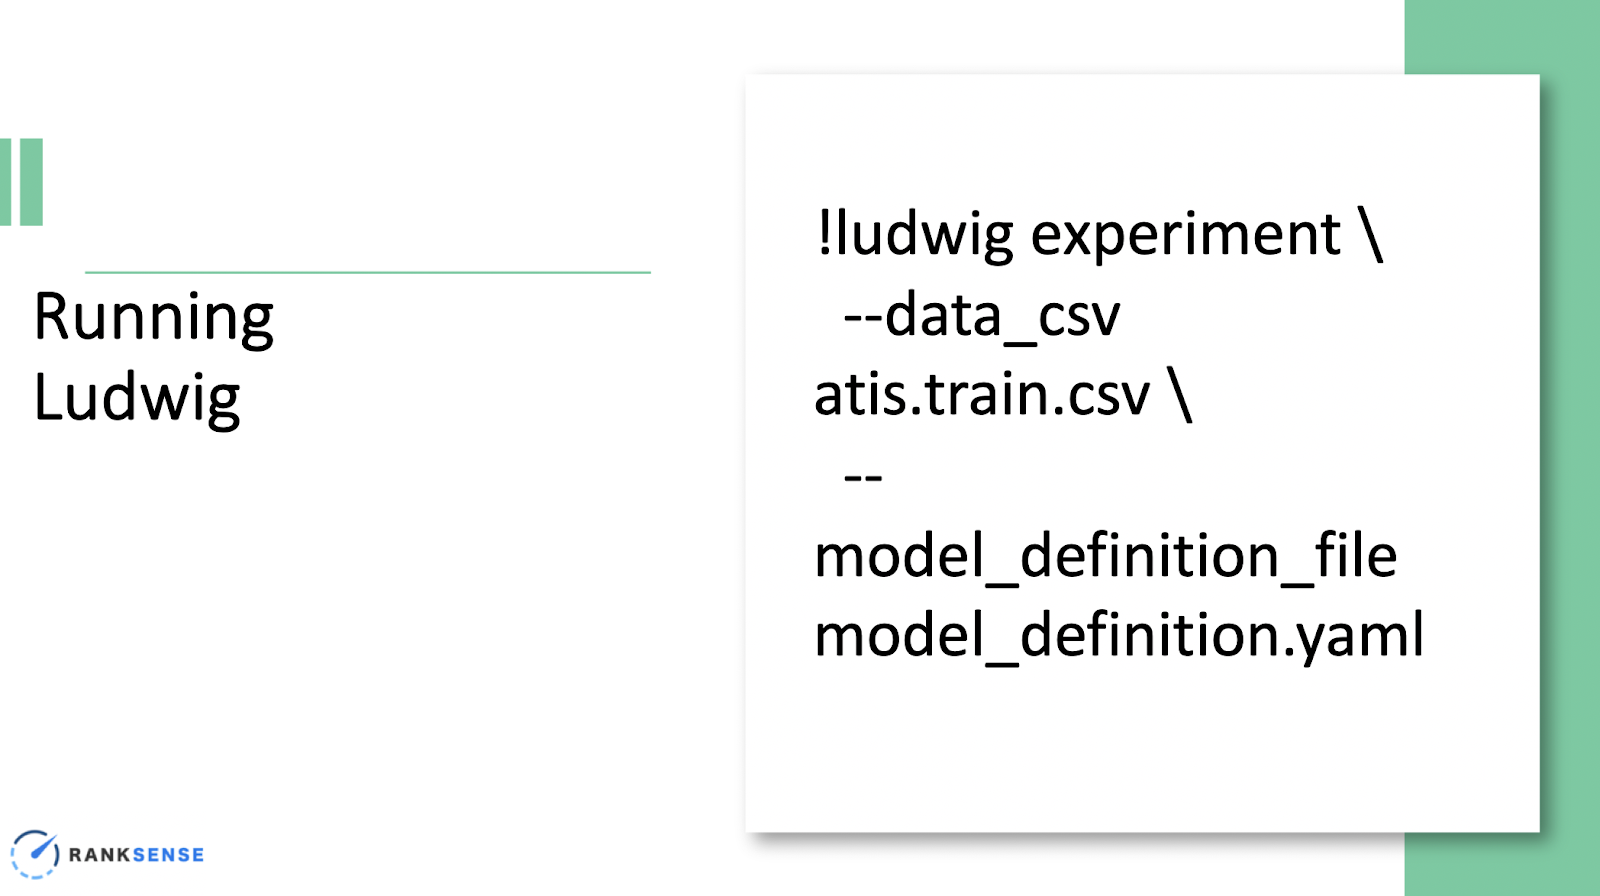
Building the Predictive Model: Running Ludwig with our configuration file
Now we’re all set to build the predictive model. Don’t worry, it’s simple and Python-free! All you have to do is type the comment shown below with a dataset and the model configuration file you created.
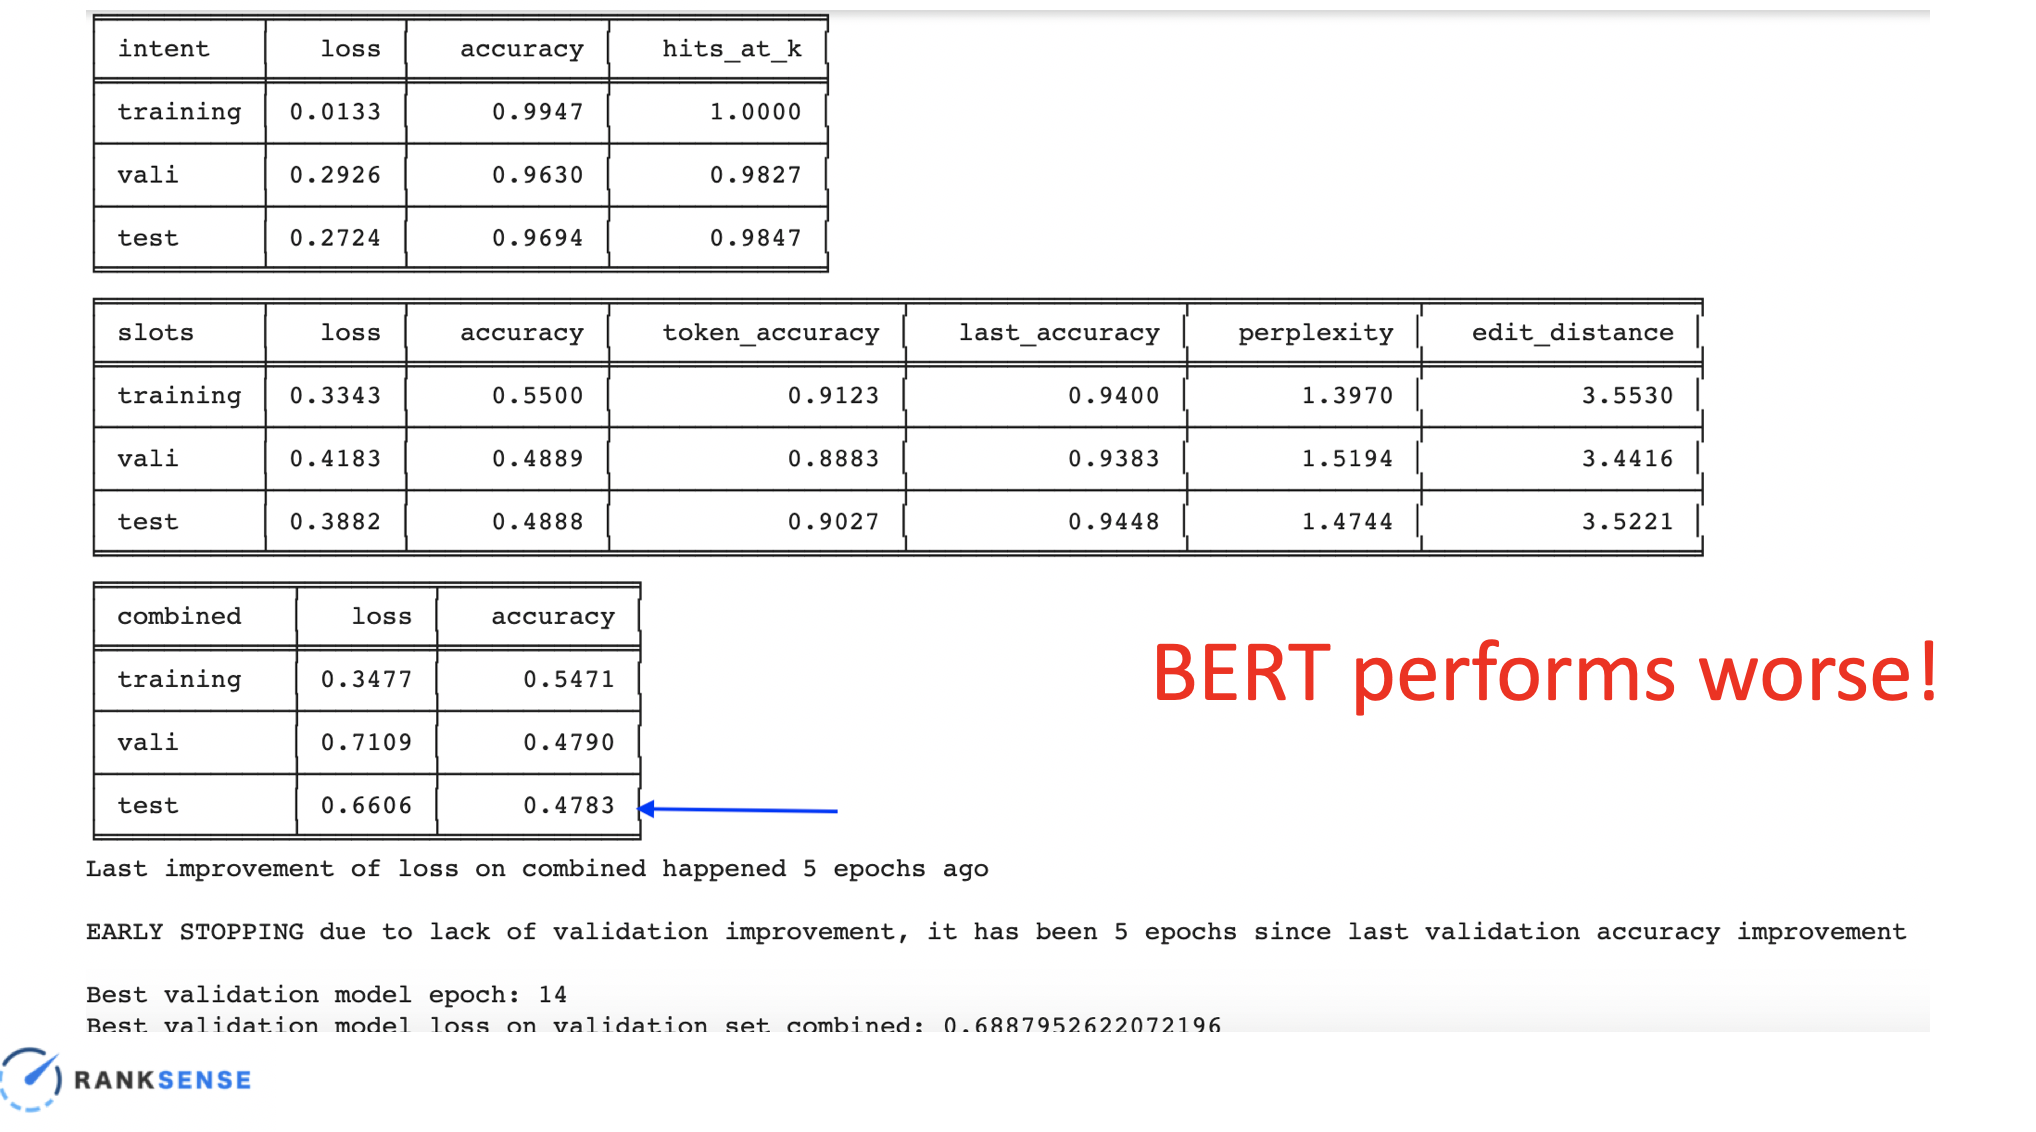
When you run this, it will run for quite a bit of time, which is why we set it up to DPU. It will take you about 20-some steps to give you the accuracy statistics. As you will see with the intent classification, the accuracy is very high.
We split the data set into 3 groups—training data, the bulk of the data that the model will learn from, the validation set, used to adjust the hyperparameters dynamically, and finally data the model hasn’t seen yet to verify that it will work correctly. The test is the real proof–it shows about 0.65, which is really good considering we didn’t need any deep learning expertise, which if applied, would have yielded an even higher result.
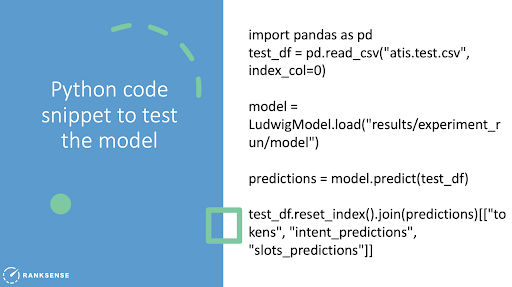
Test the Predictive Model: Running Ludwig service
How do we predict? With the python code snippets shown below, (Hamlet couldn’t resist!) you can use the test data set to verify whether the model works.
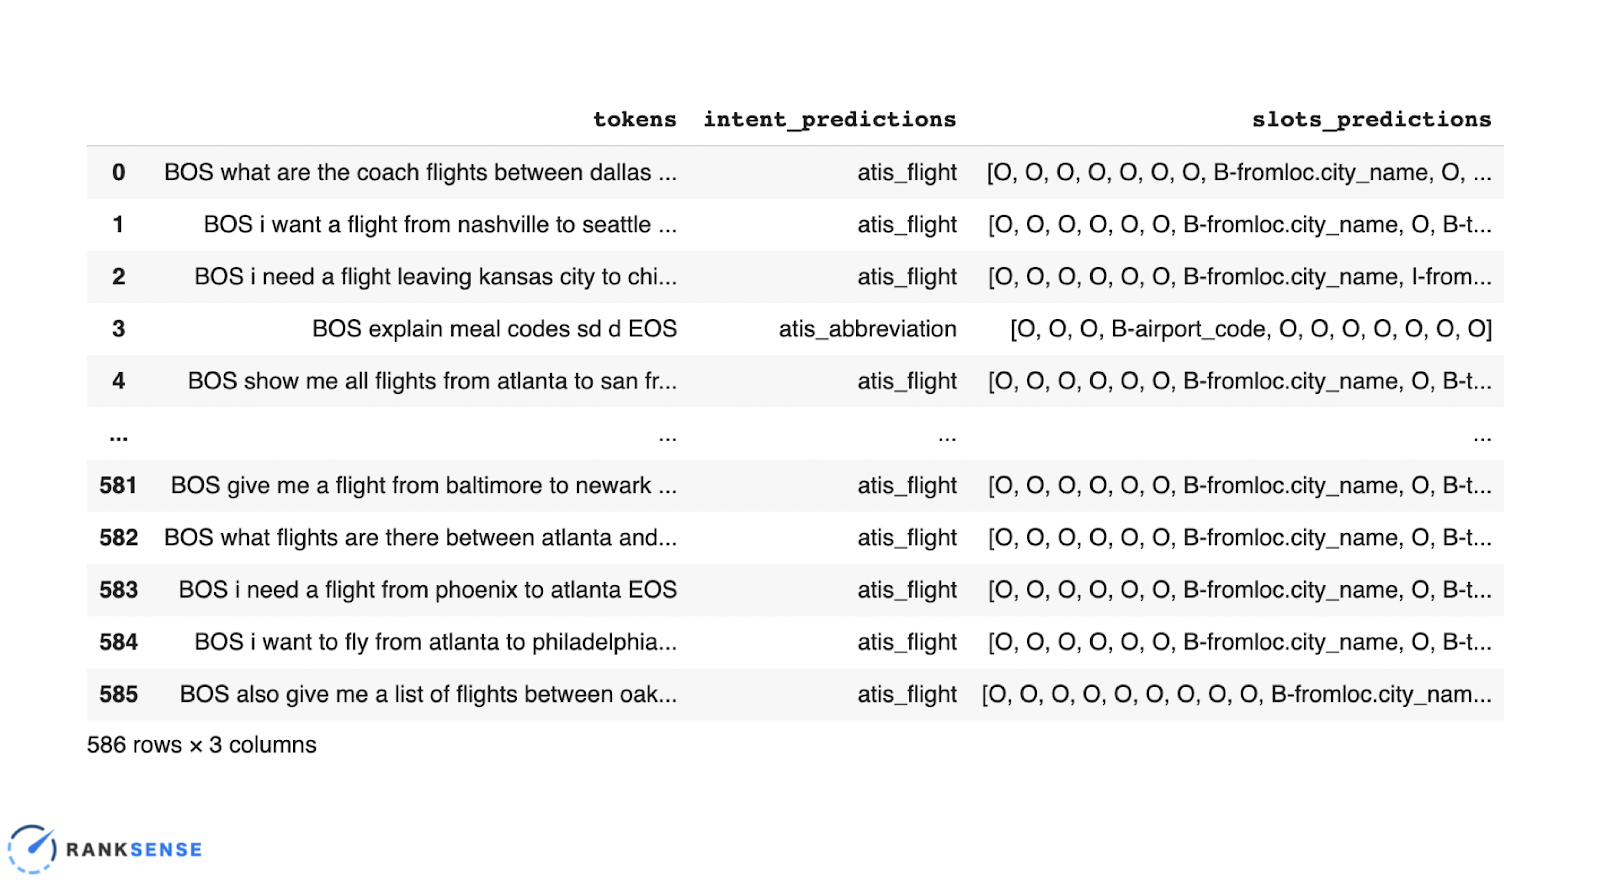
By copying and pasting the code above, you get this result. BOS, meaning beginning of sentence and end of sentence, is a kind of convention in this dataset. The predictions for intent and slots are shown based on what the system was able to extract. You can adapt this using a dataset for any industry—hospitality or e-commerce, and once you have the labeled dataset, you can train the model to predict things.
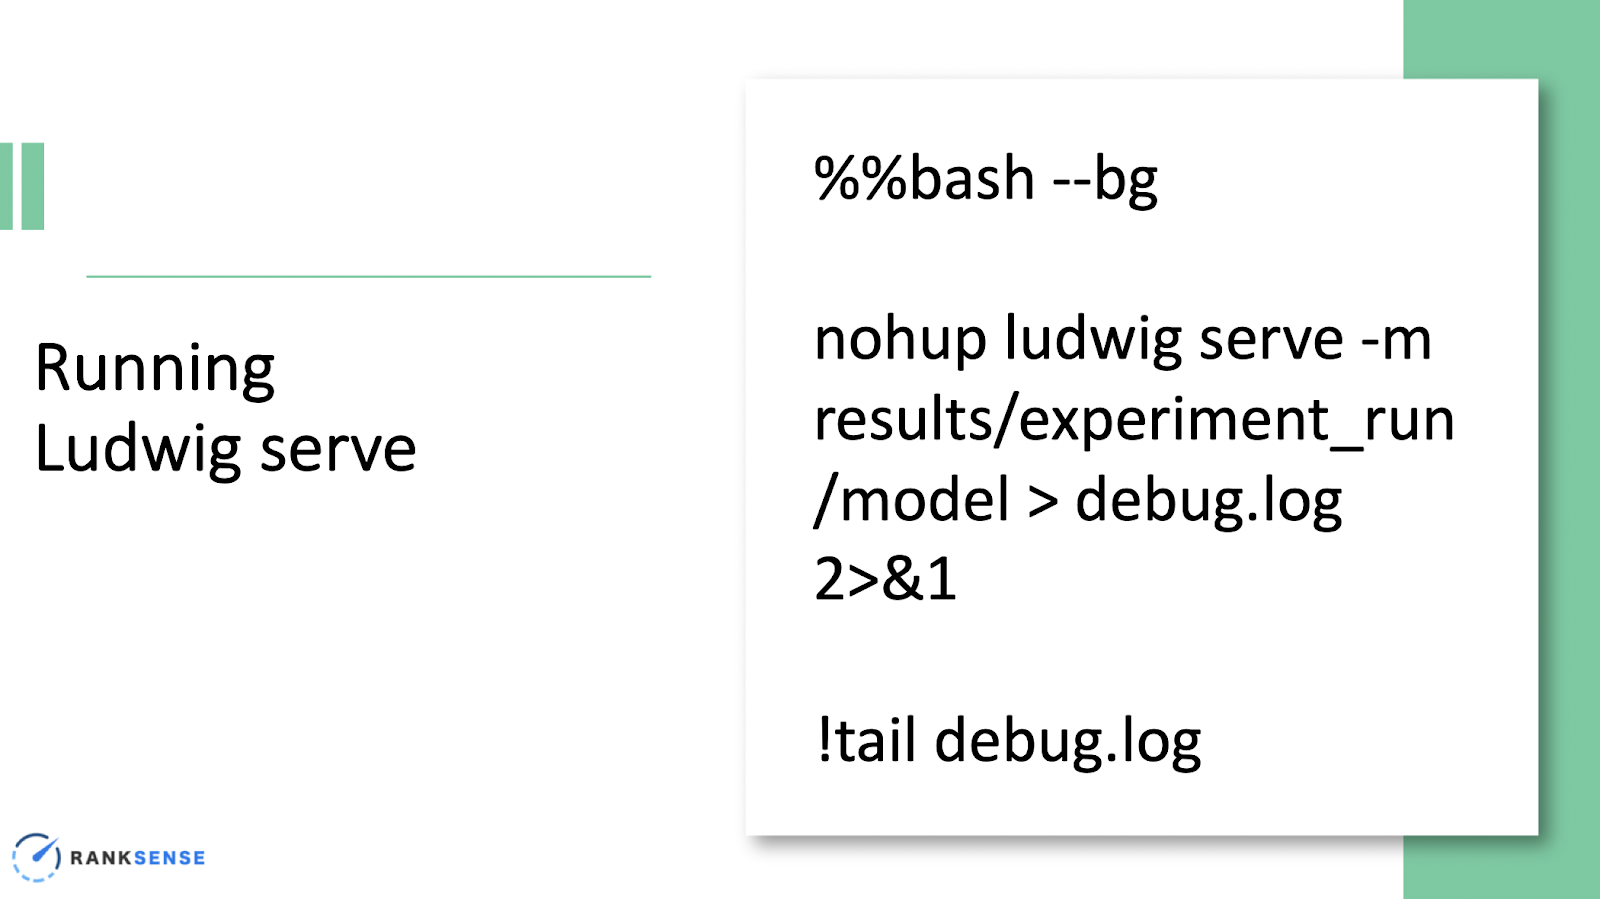
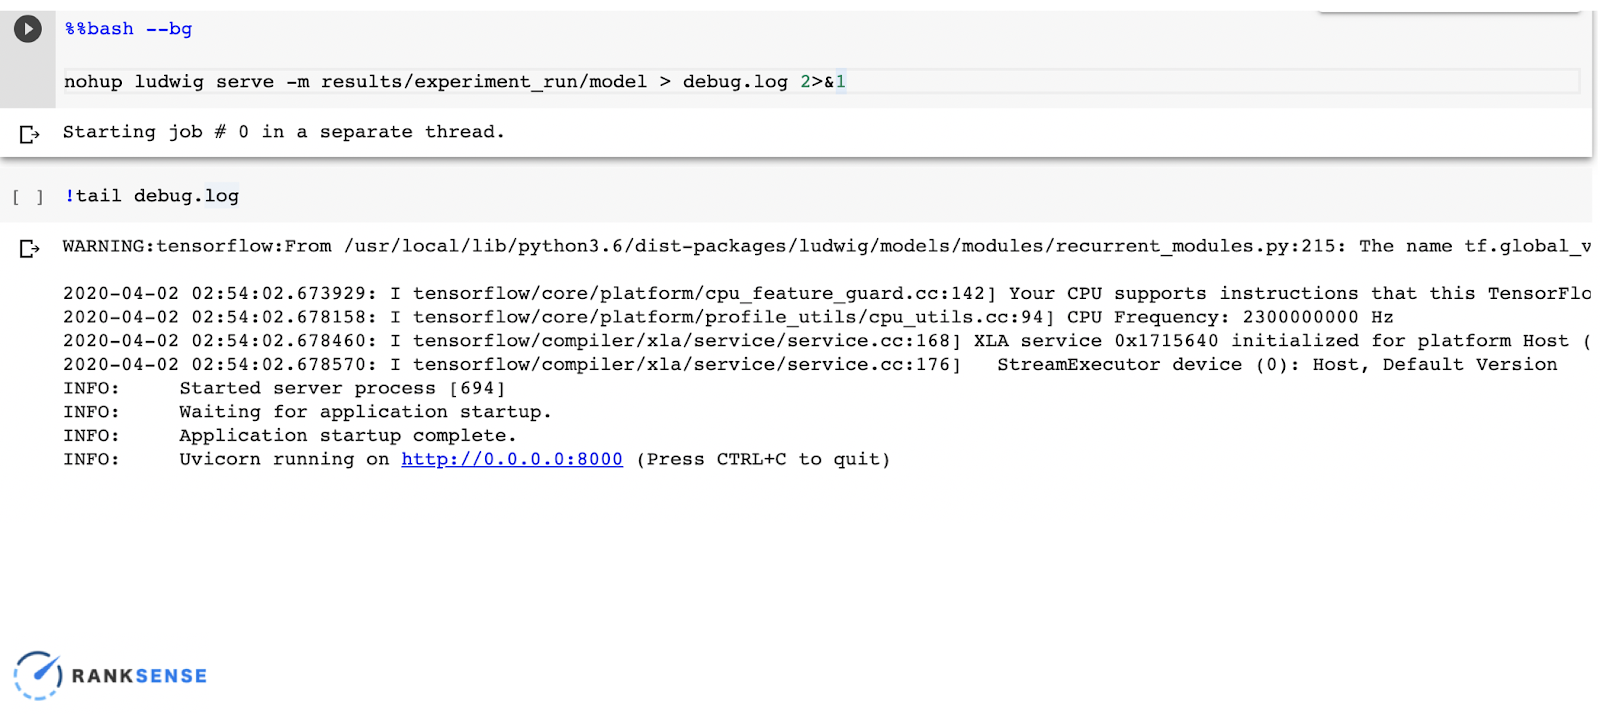
Serving the Predictive Model: Running Ludwig serve
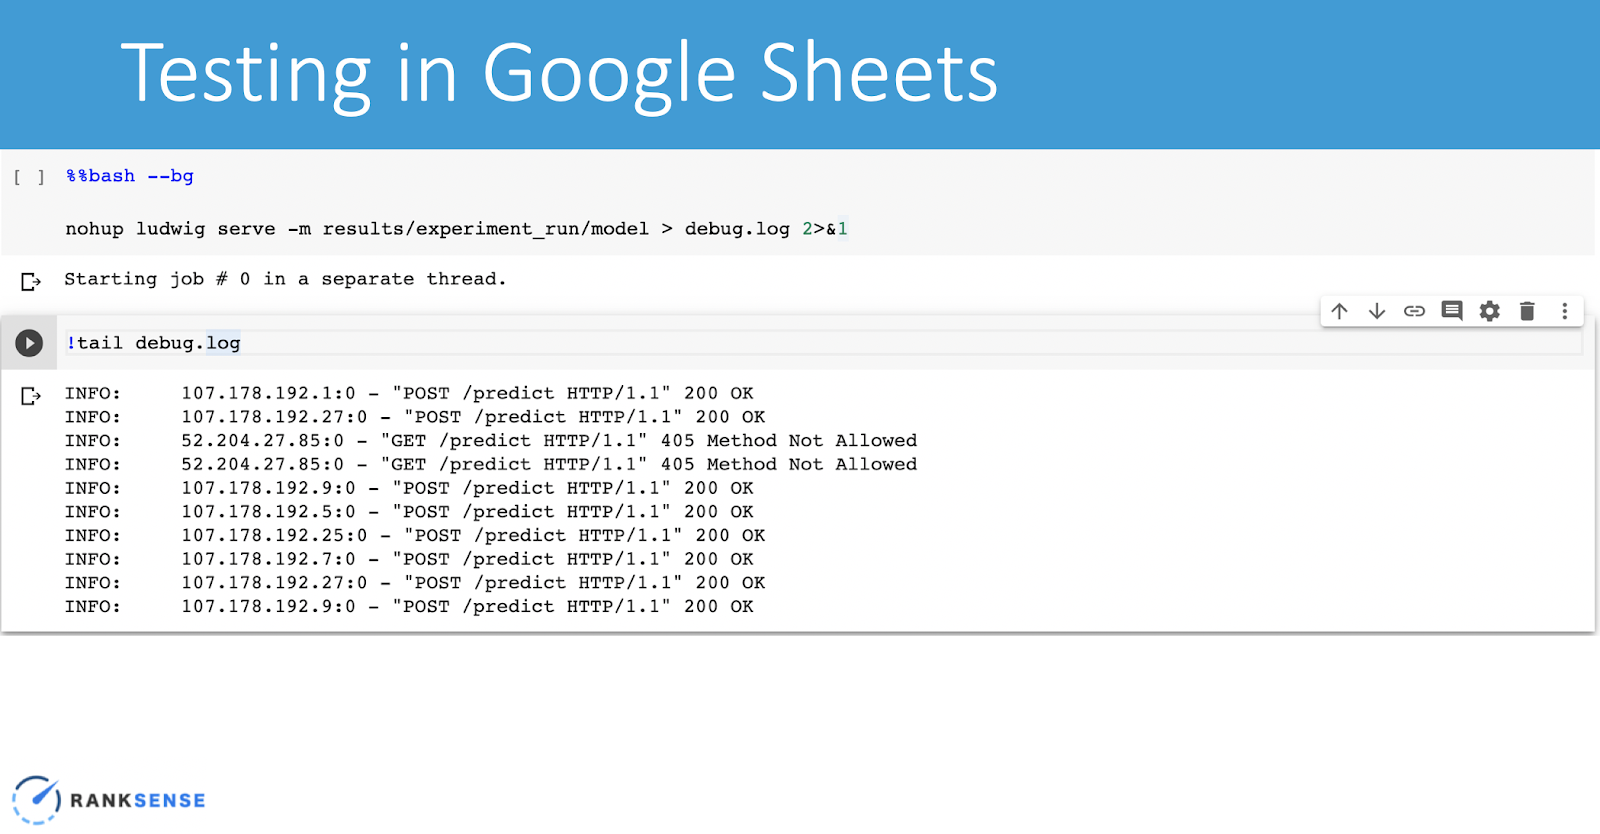
Now that we built this model, how do we expose it so we can use it in Google Sheets? In the first step, we will use Ludwig serve to serve the model. That’s the beauty with this tool; it’s so simple and you don’t have to do any coding.
So when we run it with these comments, it will run in the background and the comment tail debug can be executed several times until it is completely finished. The challenge with this is that the IP address is only visible within the notebook. We will address this shortly.
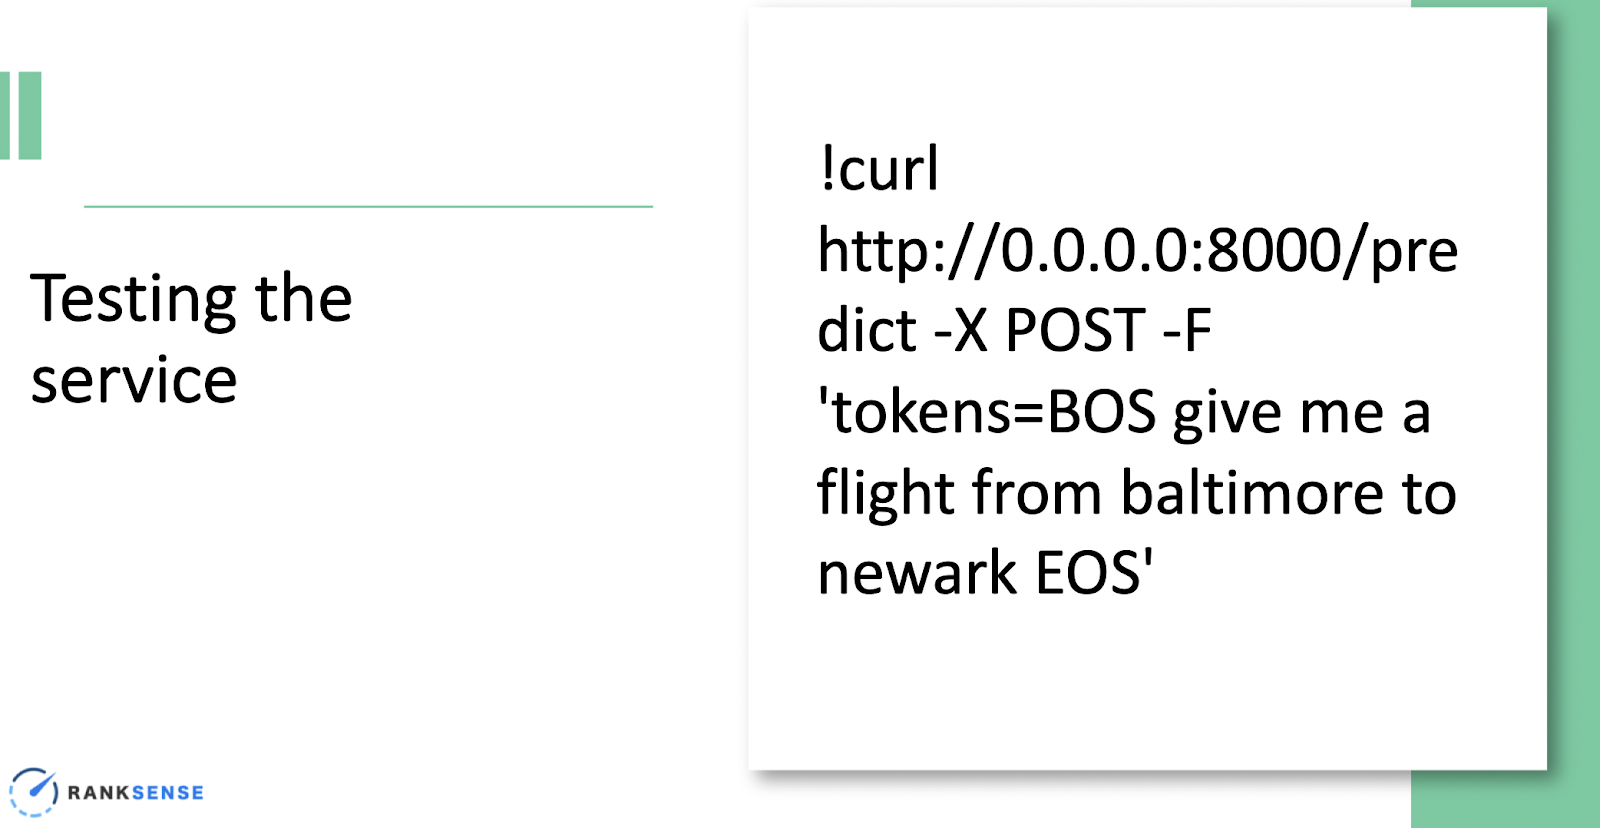
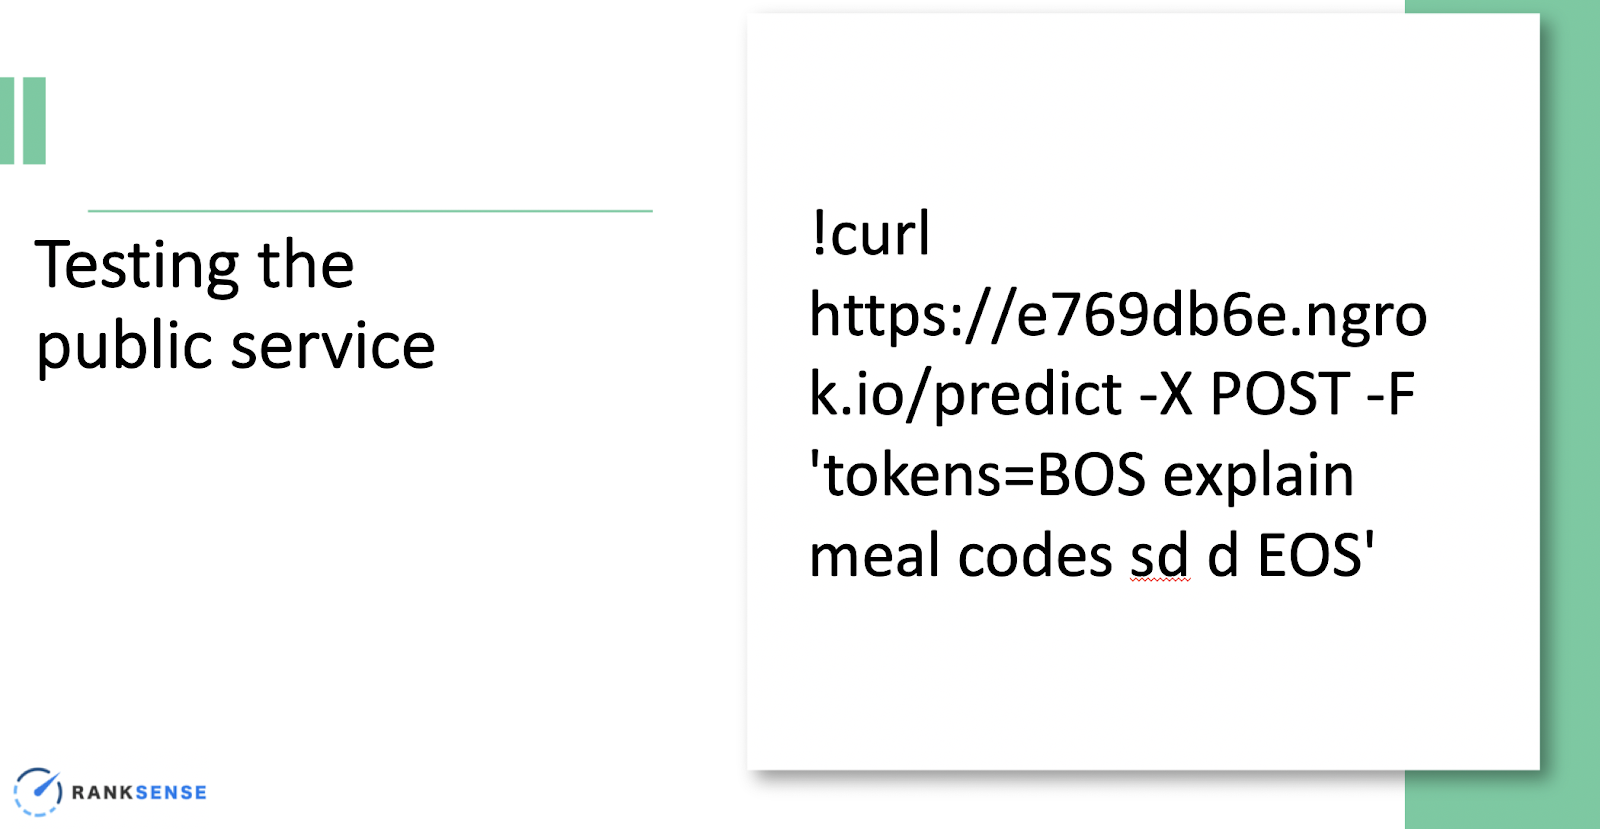
Now we will test the model in an API request perspective using a tool called curl. We will run comments against this service, passing the test “give me a flight from Baltimore to Newark”, which should return the response.
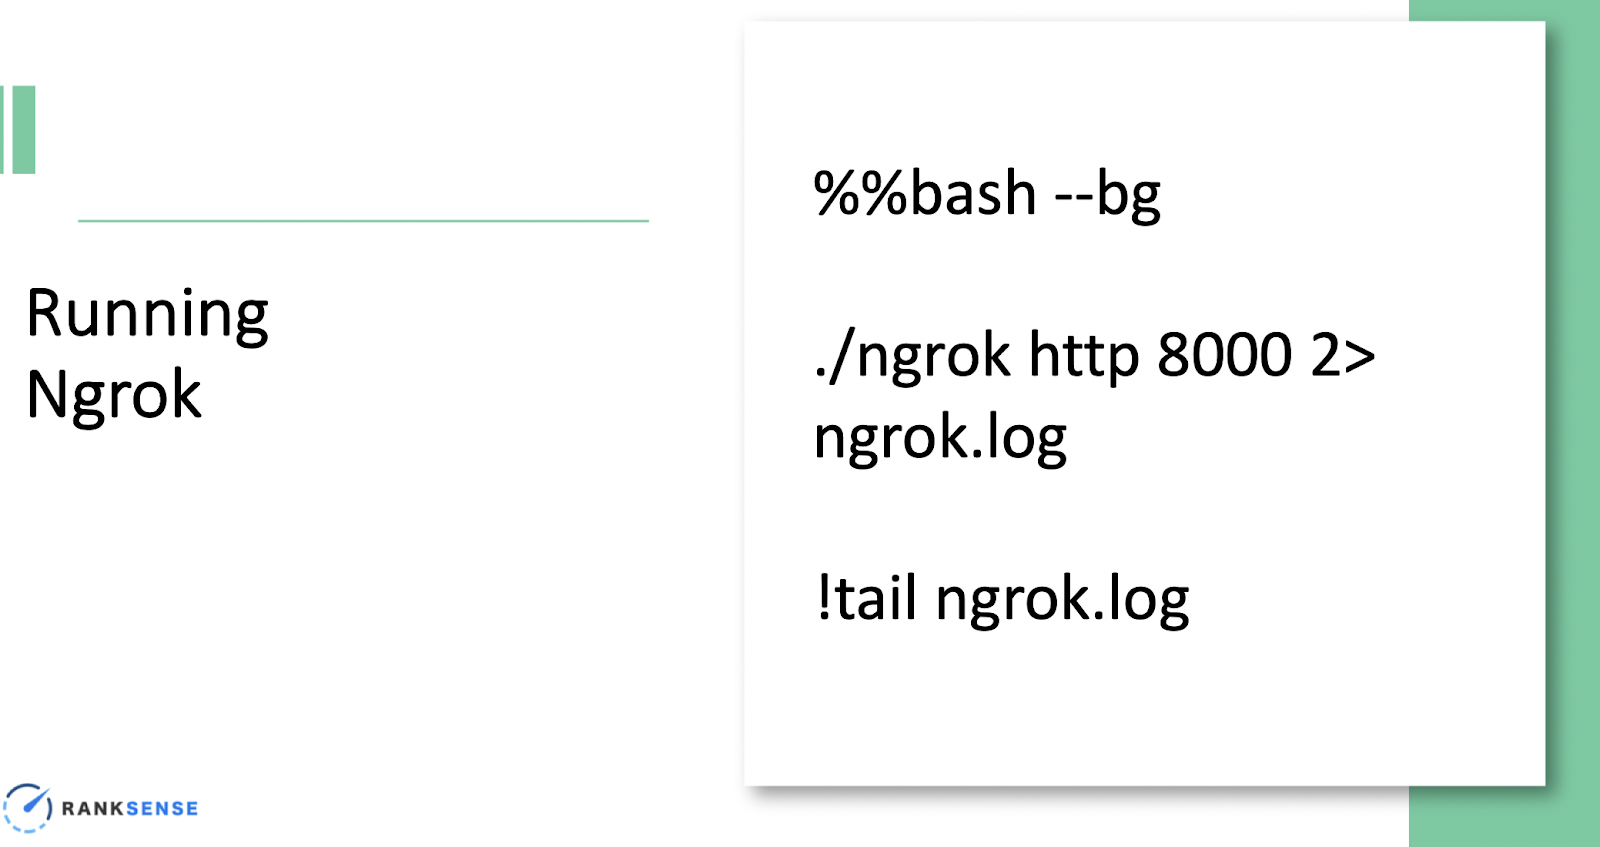
Now we need to expose the service by creating a public URL, which we’ll use Ngrok for. It allows us to have a proxy connection within the notebook on your computer and expose the connection by mapping the TCP port that you have locally. Although it’s an obscure tool that developers and SEOs may not be familiar with, it’s exciting stuff to learn.
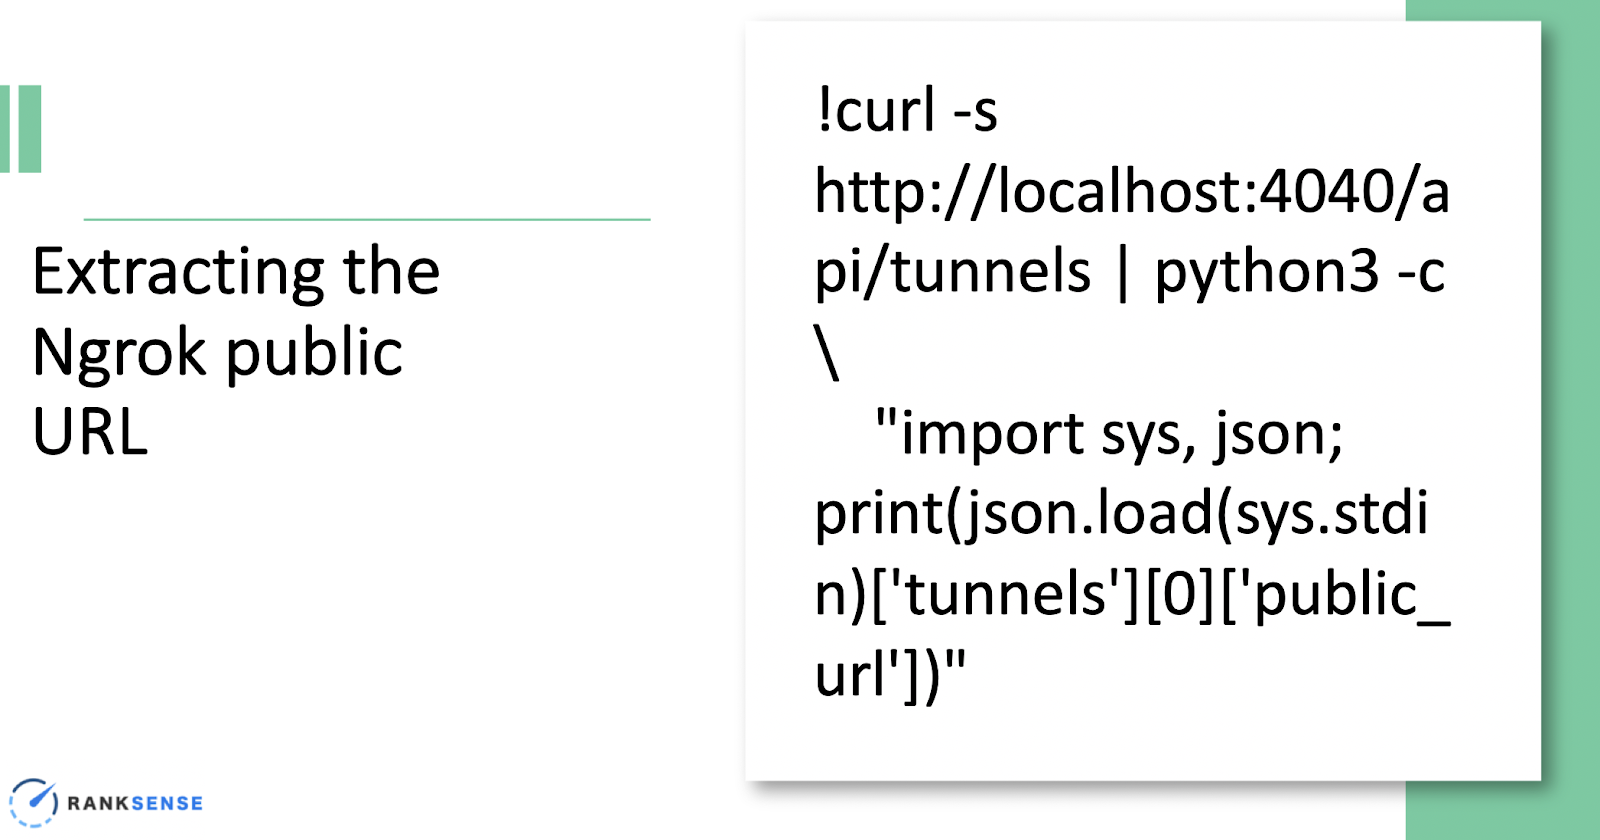
Now we need to learn the URL we need to expose. Copy and paste the code.
After you run it, it will return your temporary URL, where you’ll be able to access the service within the Colab Notebook.
Our Journey So Far
We built a travel-specific intent prediction model
We can access the model using a temporary public URL
Next, we need to access the URL from Apps Script and Google Sheets.
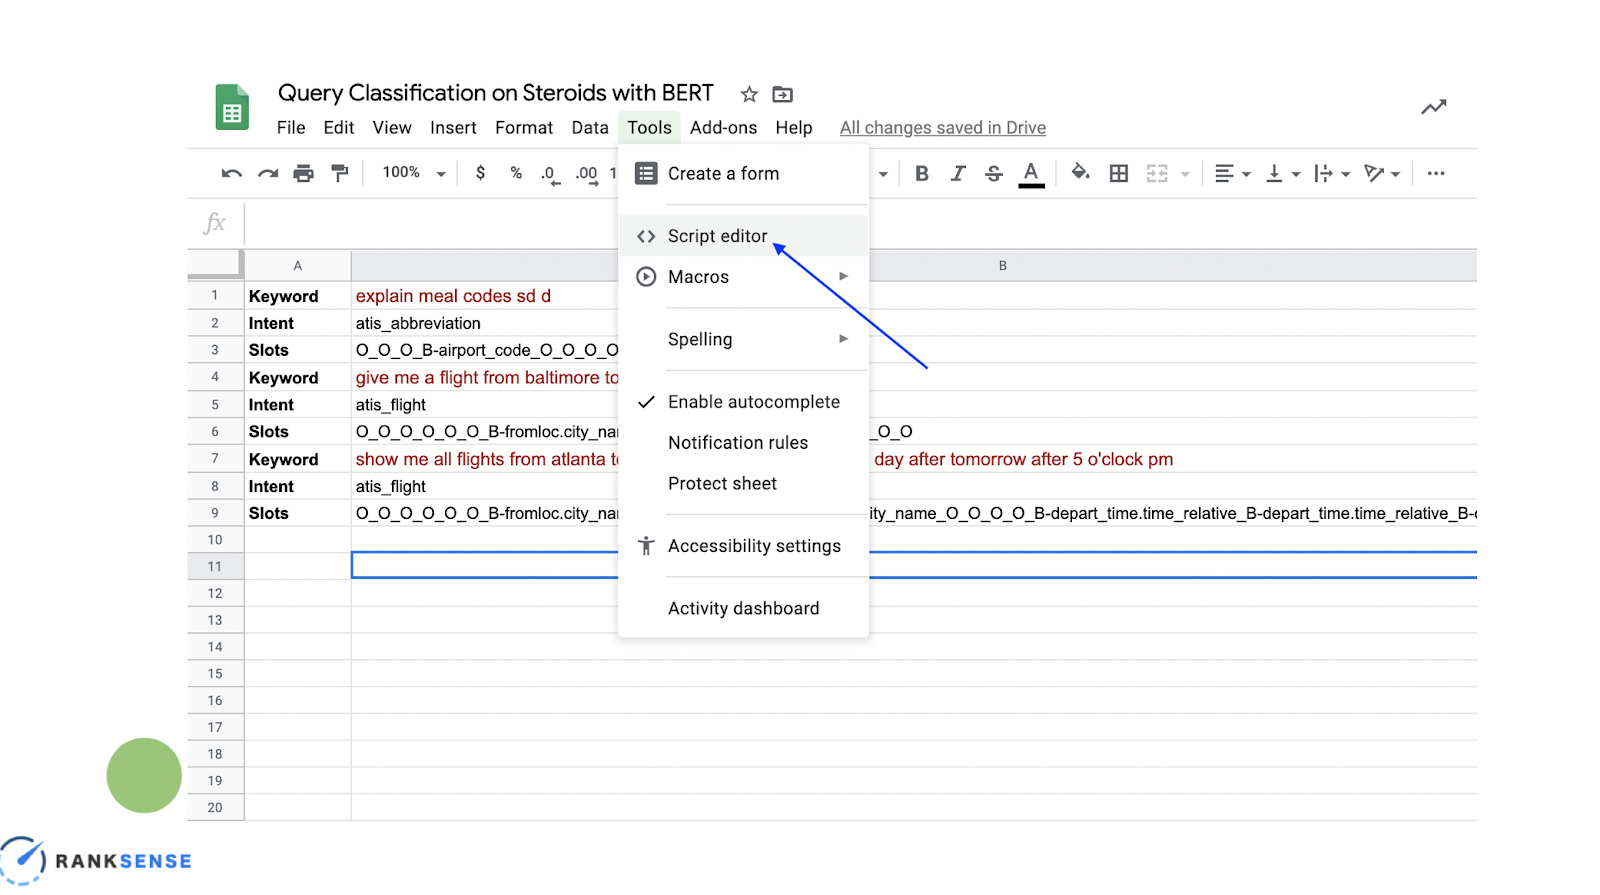
Accessing the Predictive Model from Apps Script: Creating a Google Sheets custom function
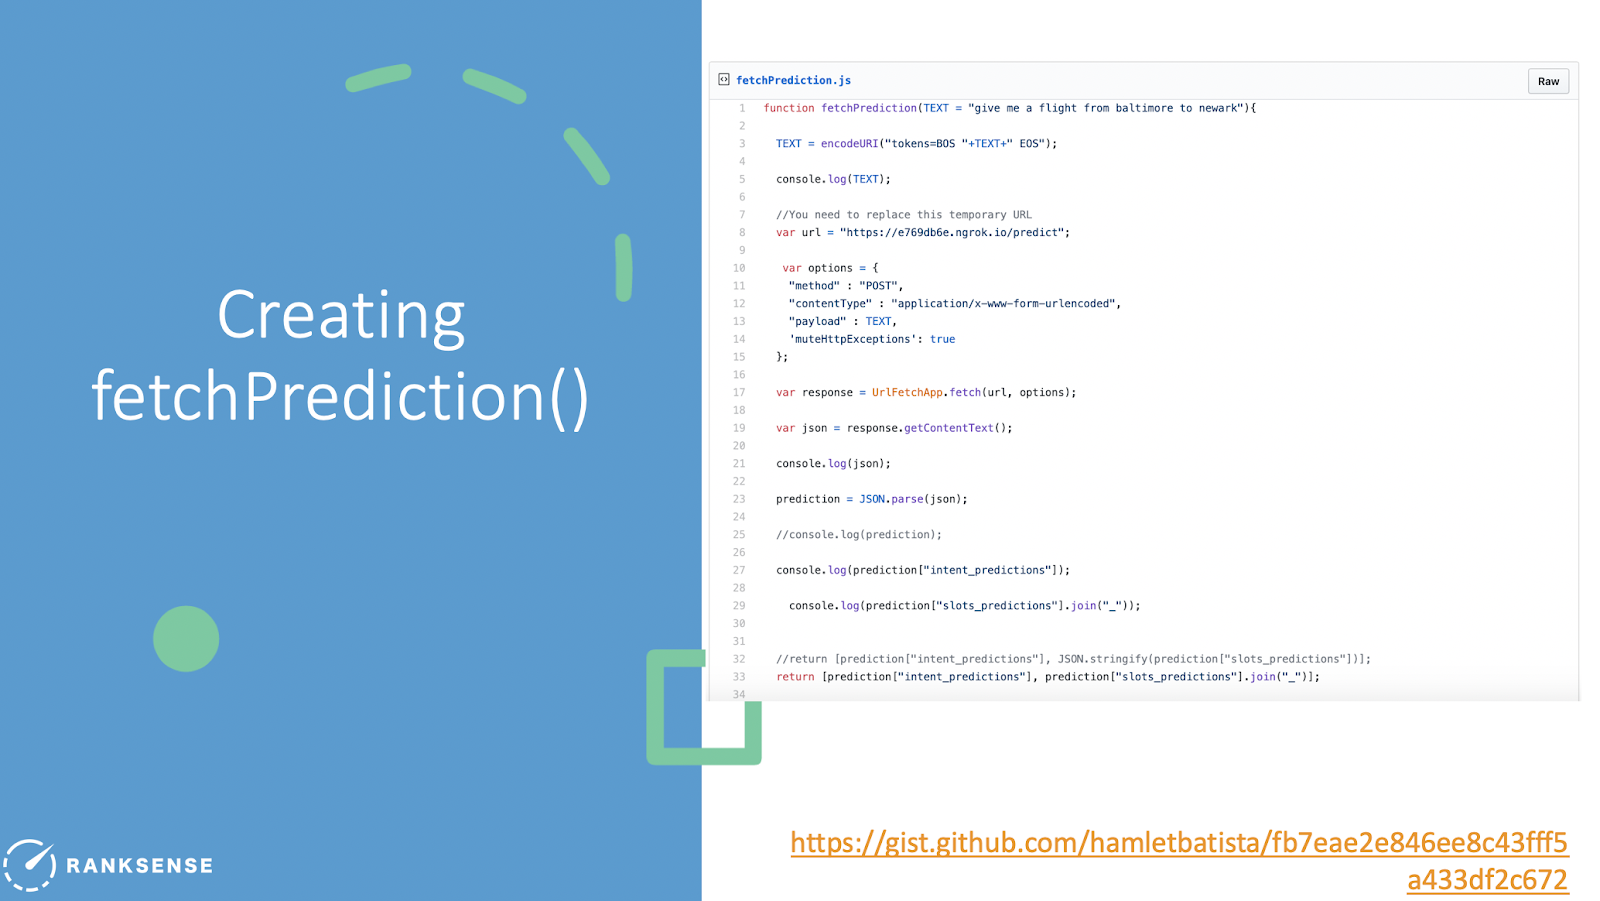
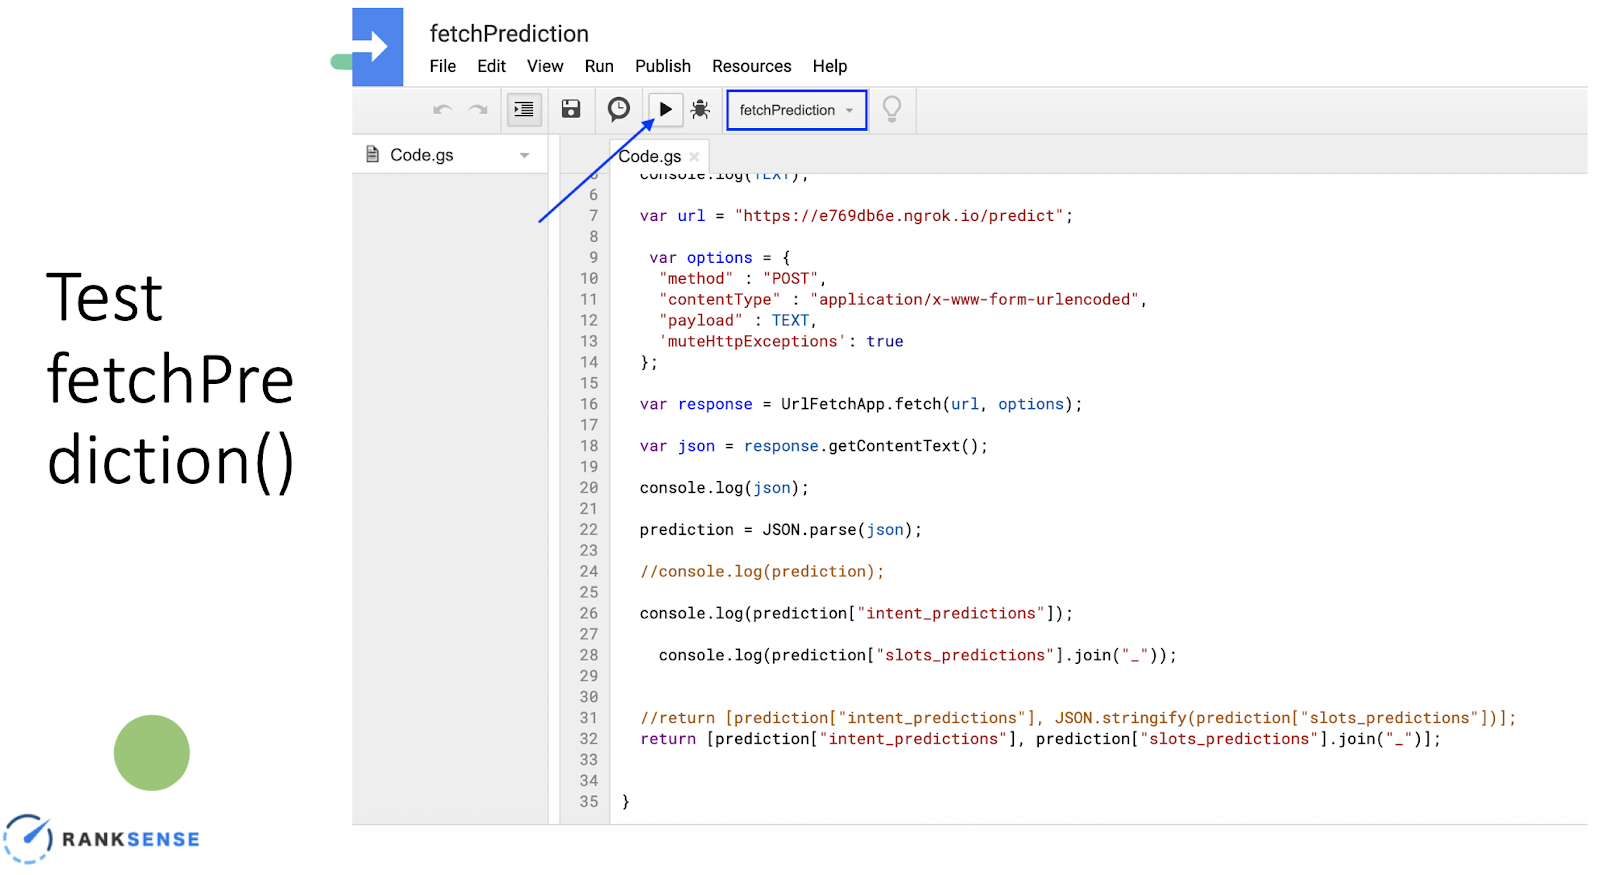
In your sheet, you’ll go to the script editor where you can copy and paste fetchPrediction(). Access it using this gist. Before you run it, replace the URL.
Now test it by clicking the play button.
This should be your output. You should have the input encoded into a URL and the intent predictions in the adjacent output.
Testing in Google Sheets: Calling our custom function fetchPrediction
We will now call our function fetchPrediction, save it, provide the keyword we wish to predict, and that’s it. Testing it makes sense to do in the Notebook, but to have it in a permanent place, you need to set it up in a server and deploy the steps to have the URL exposed.
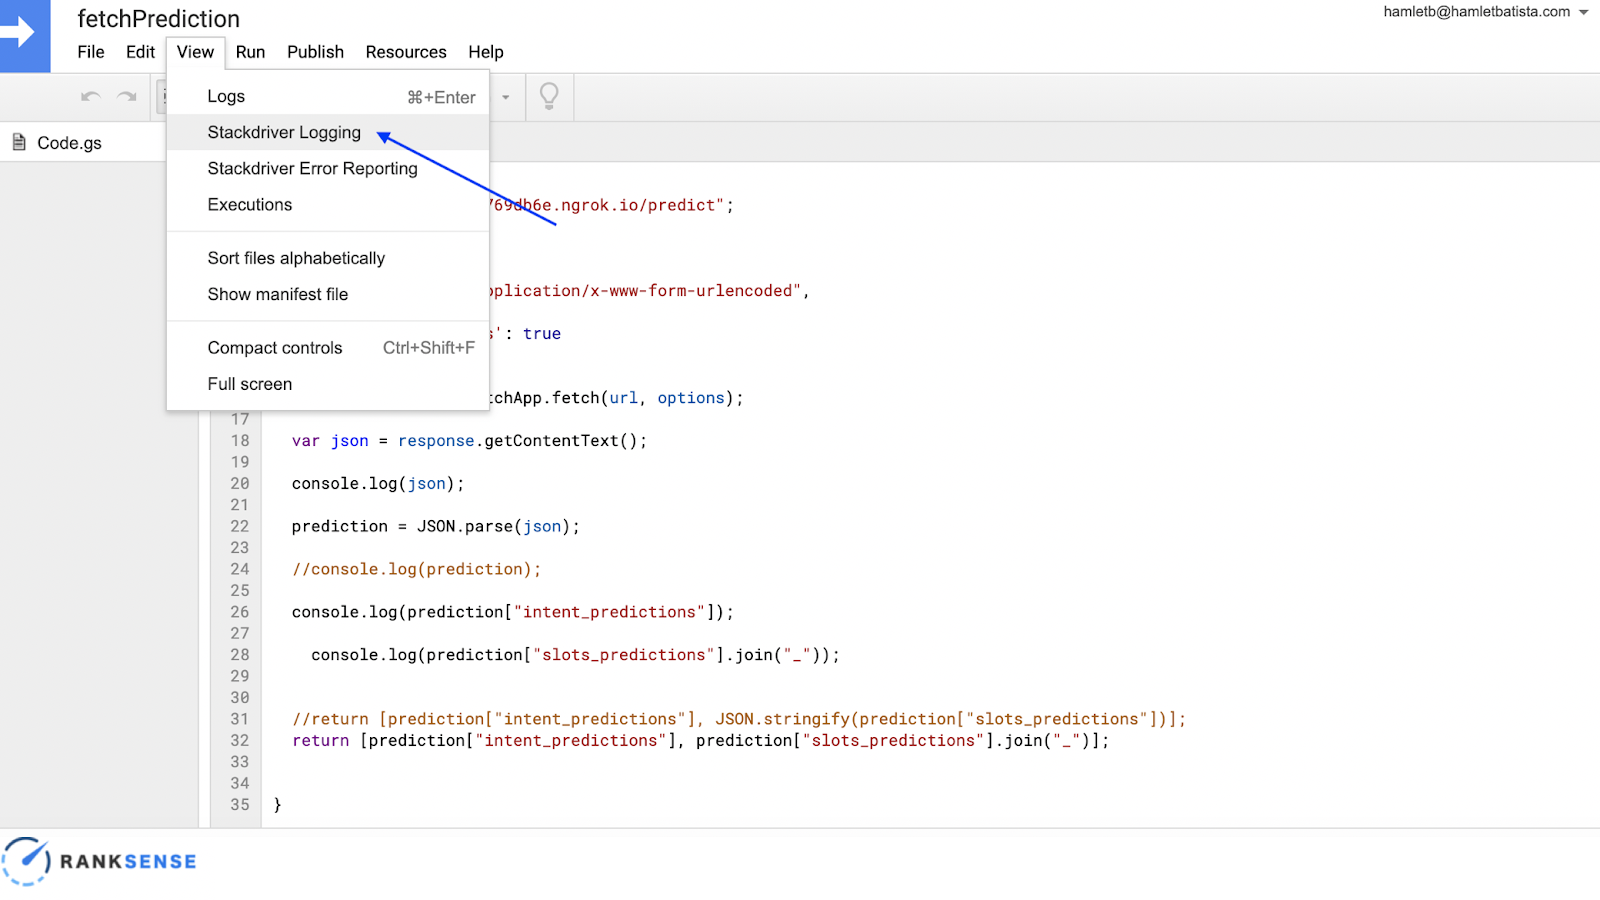
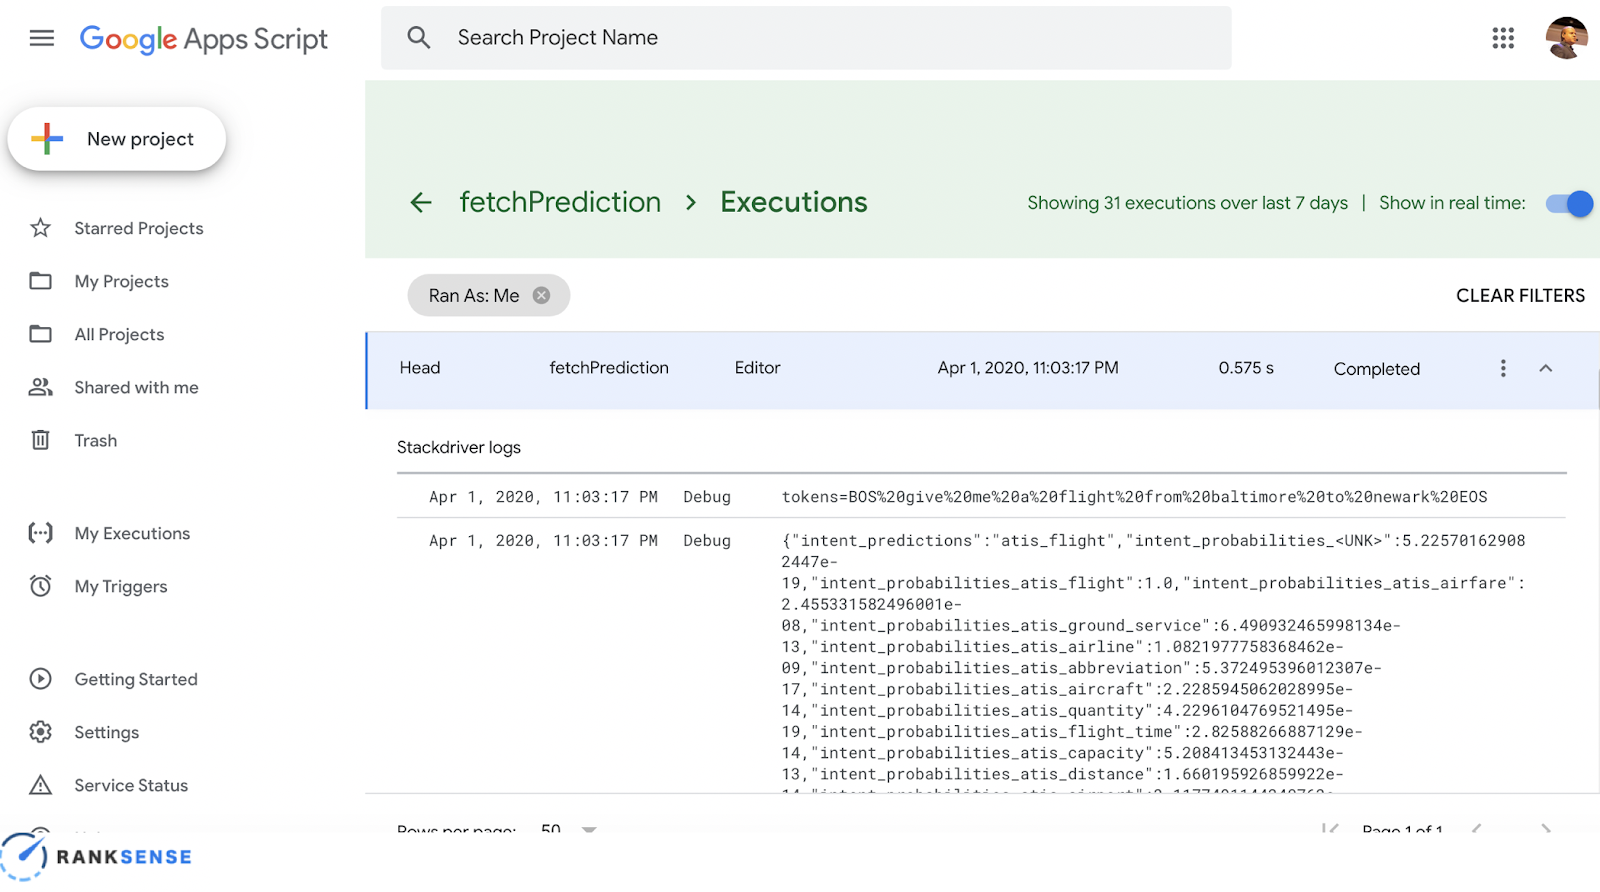
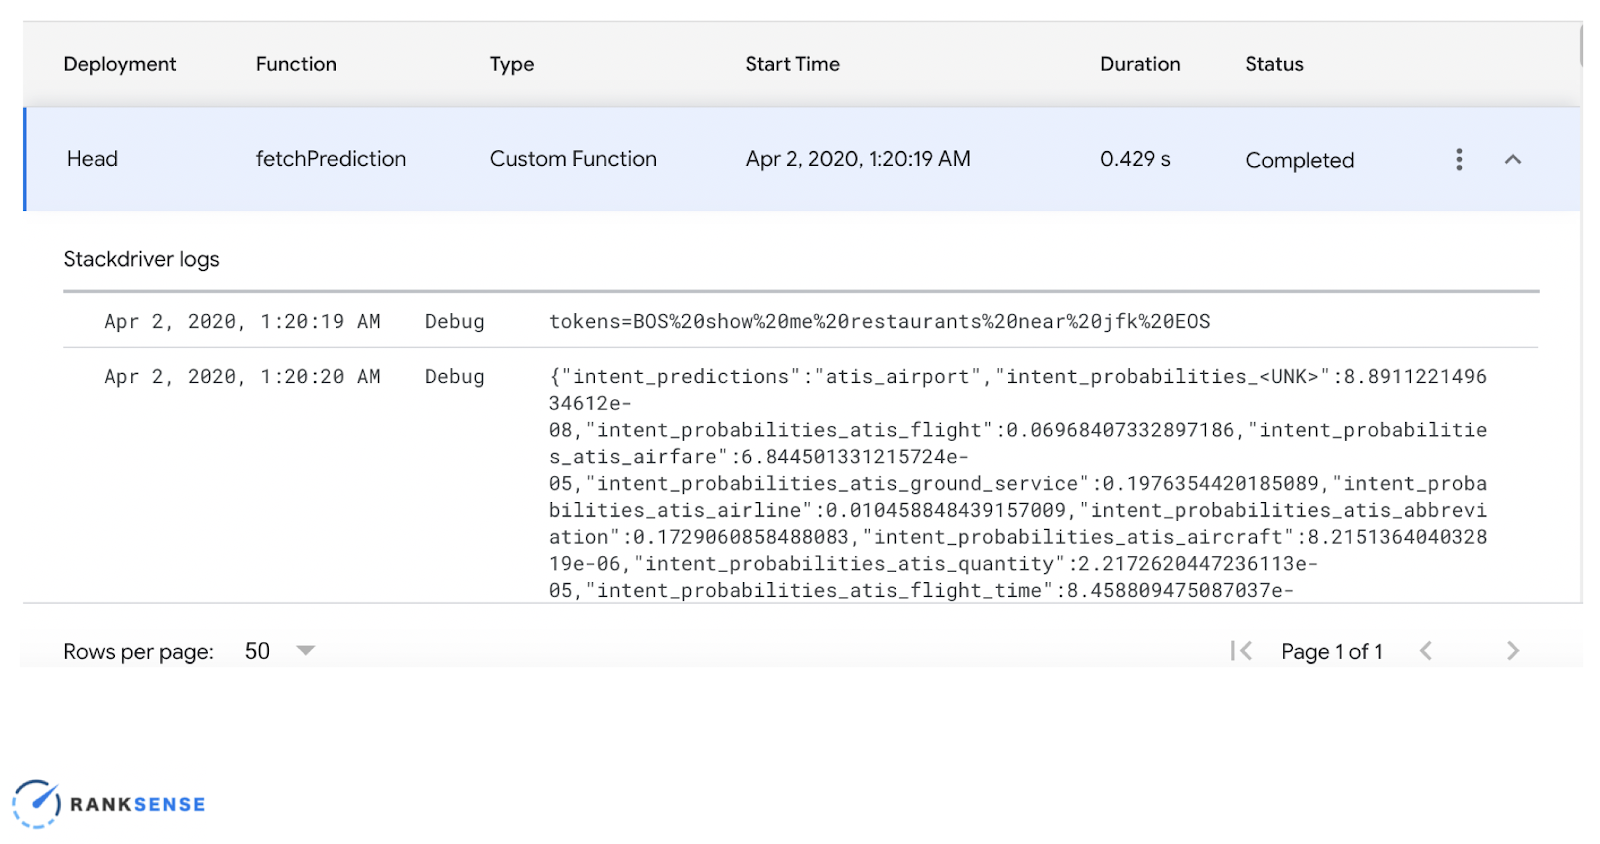
Any changes made in Google Sheets will be logged here.
Here you can look in the debug log and see the calls as you’re making them.
Where is BERT?
Originally, Hamlet was attempting this with Bert, but he decided not to use it because it actually had worse performance than this simpler model! He encourages you to find out what can make this work better. Here is the gist.
Custom Python scripts are much more customizable than Excel spreadsheets. This is good news for SEOs — this can lead to optimization opportunities and low-hanging fruit. One way you can use Python to uncover these opportunities is by pairing it with natural language processing. This way, you can match how your audience searches with your...
As we continue to improve the RankSense app for Cloudflare, we are always working to make the app more intuitive and easy to use. I'm pleased to share that we have made significant changes to our SEO rules interface in the settings tab of our app. It is now easier to publish multiple rules sheets and to see which changes have not yet been published to production.
For the following Ranksense Webinar, we were joined by Antoine Eripret, who works at Liligo as an SEO lead. Liligo.com is a travel search engine which instantly searches all available flight, bus and train prices on an exhaustive number of travel sites such as online travel agencies, major and low-cost airlines and tour-operators. In this...